1.
Power on the Kitchen Printer and connect to the internet. Use the set up instructions for each printer model. Once the Printer is connected to the internet and powered on, the devices can be added to the CURV stations printer list.
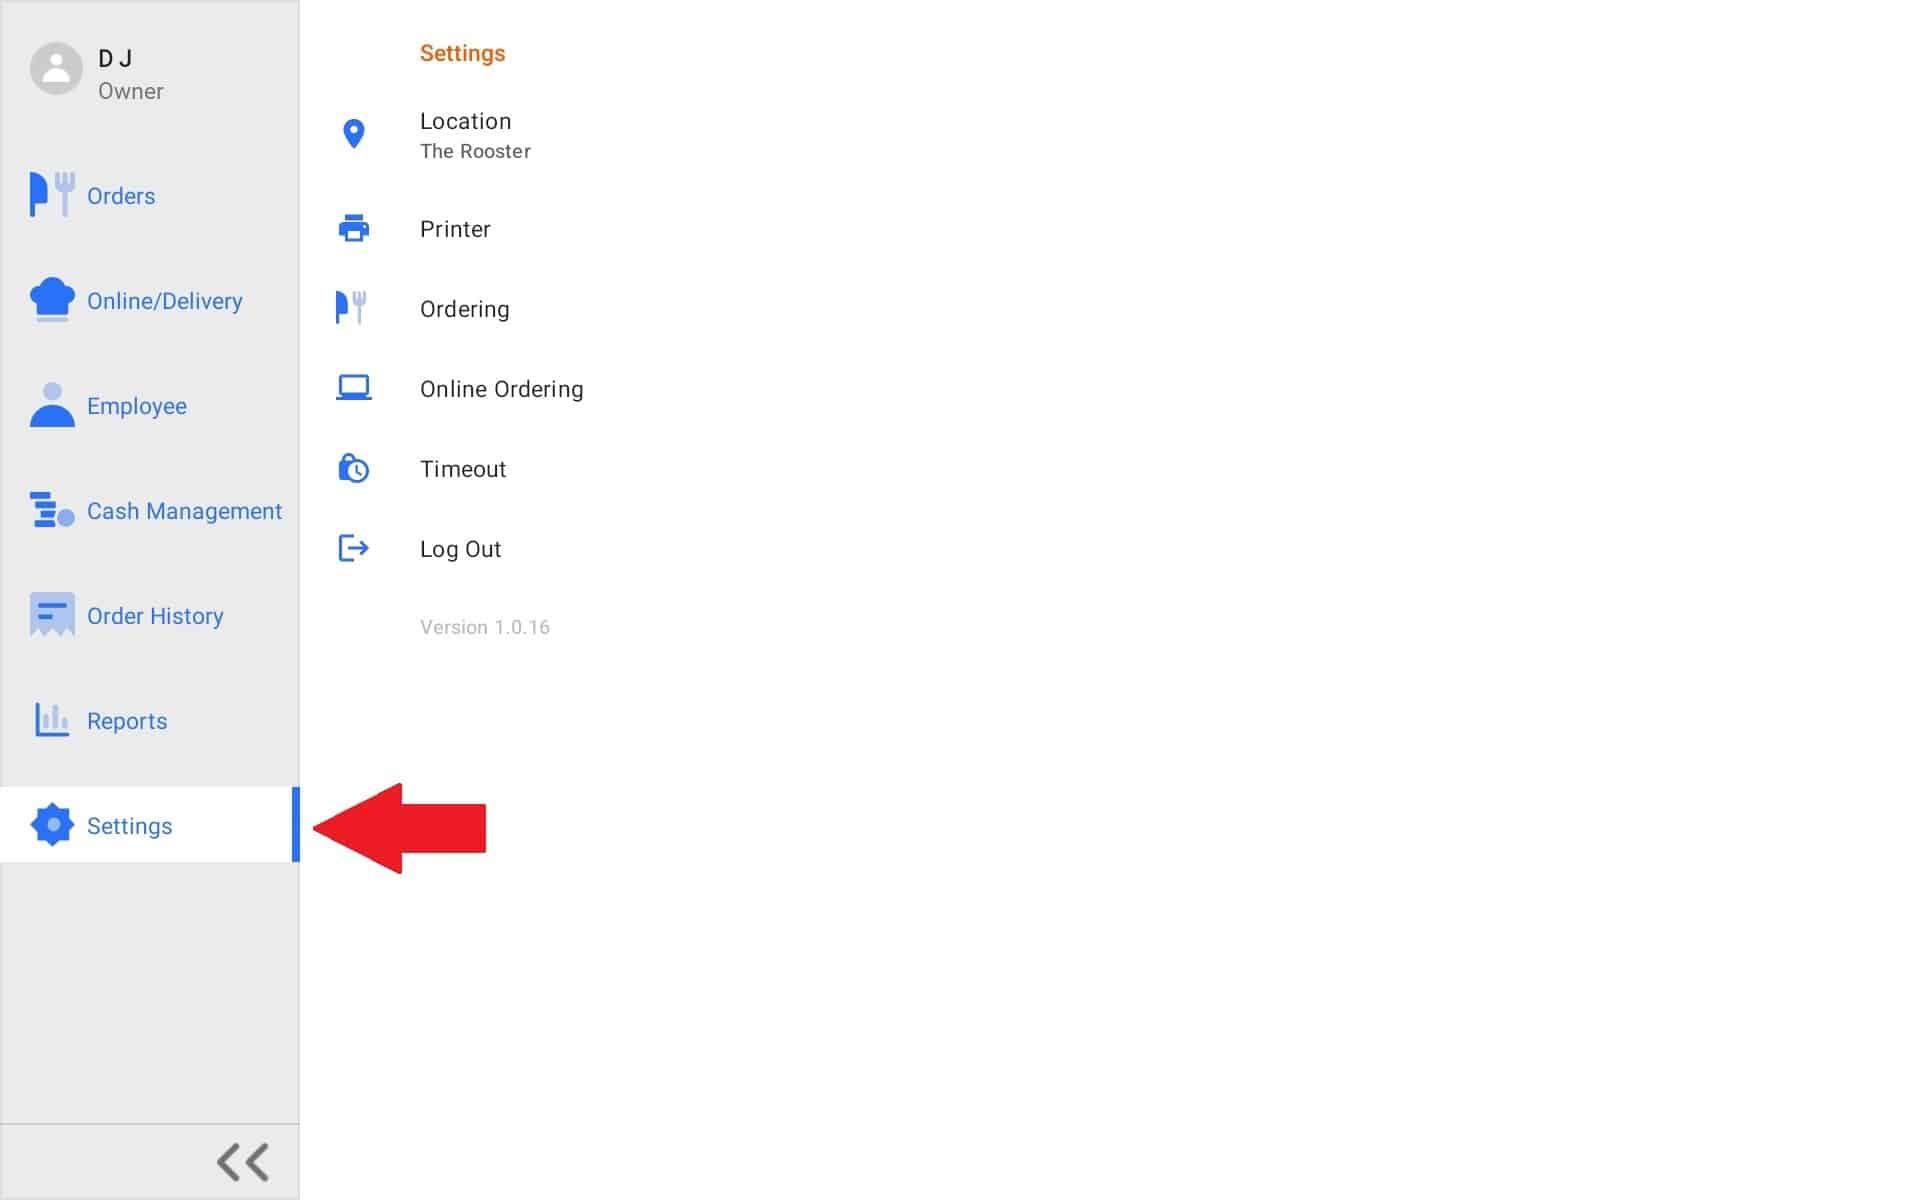
Once on the list, printers can be assigned to as the receipt printer, kitchen and kitchen stations. Printers can be accessed on the settings tab under the printer section .To add a new printer, go to the settings tab on the pos station. The settings menu will appear with all settings options.
Please note: *Make sure that printer is connected to the same network as the POS devices.*
2.
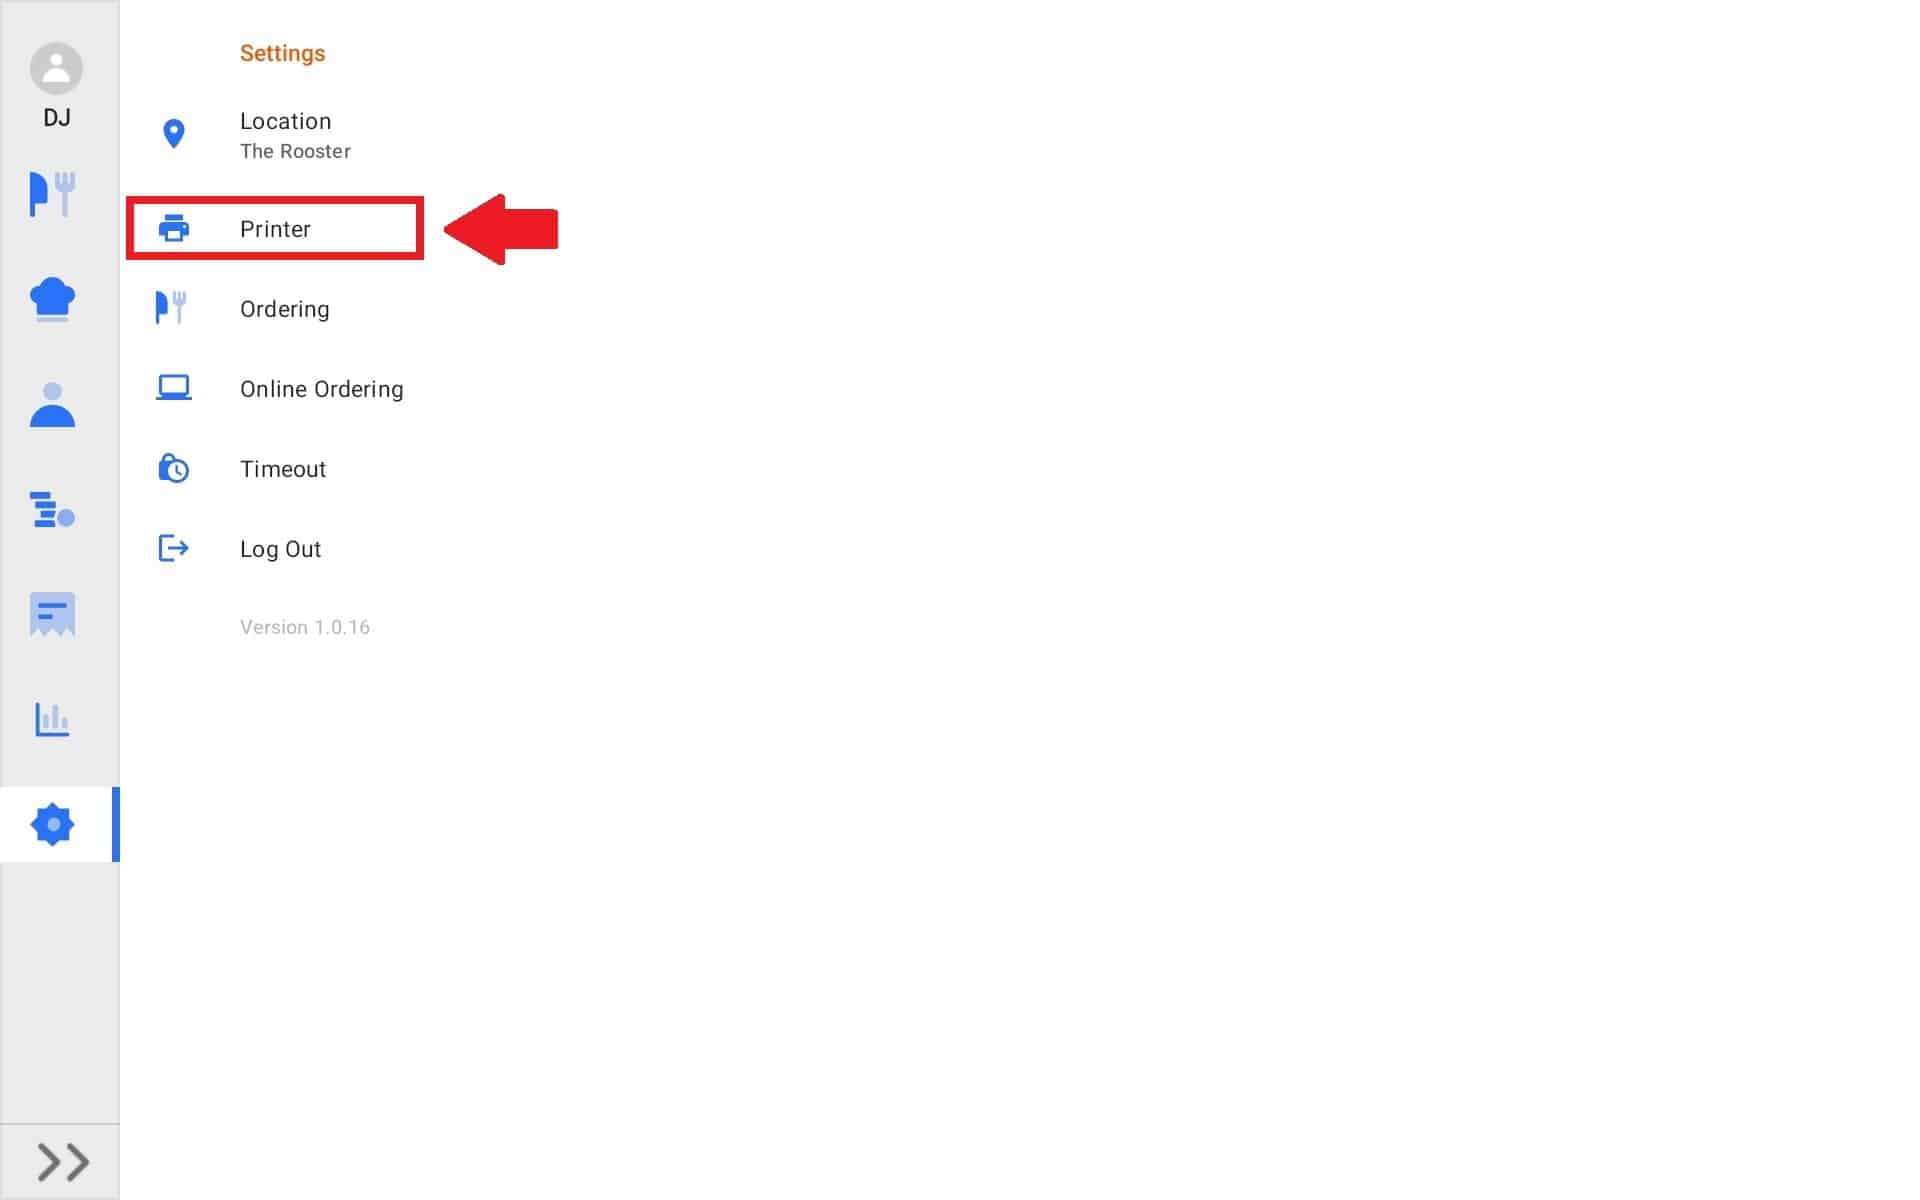
Select the printer tab.
3.
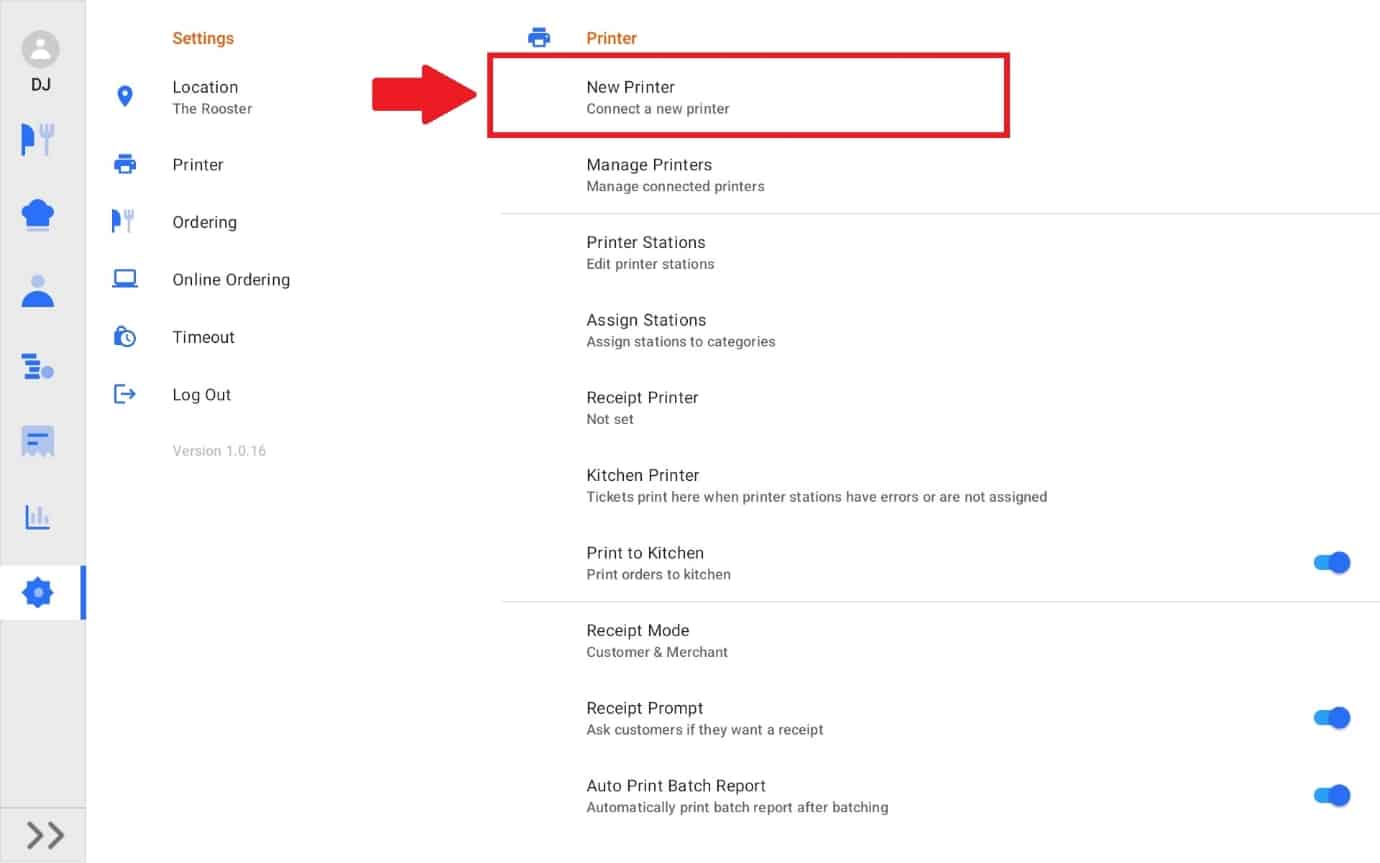
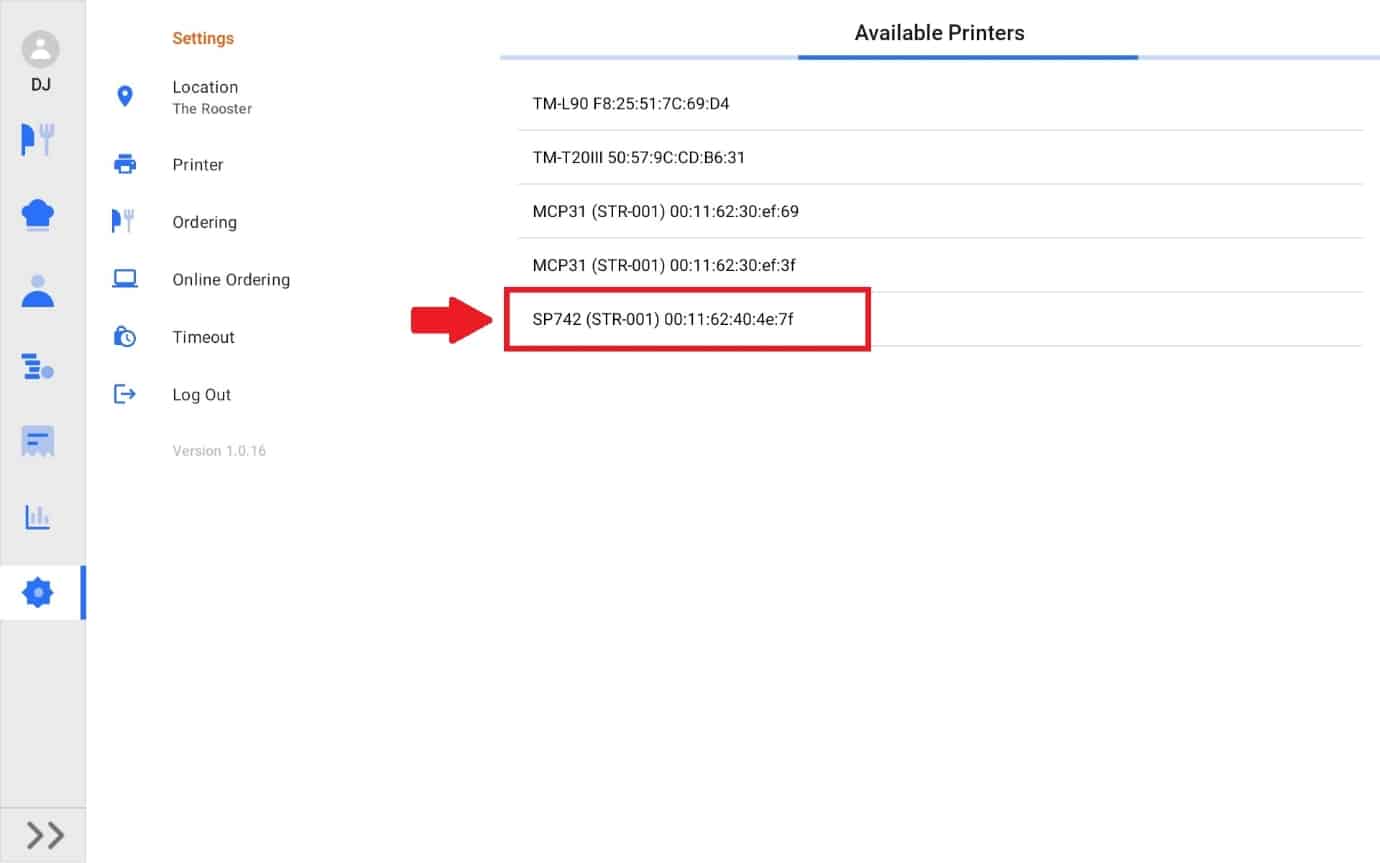
Printer settings will now be viewable. You be able to see “New Printer” at the very top. Select “connect a new printer”, a list of available printers will be generated.
Reminder: All devices must be connected on the same network.
4.
When your connecting a new printer, you’ll need to obtain the MAC Address from the device. Each printer comes with a specific address that you will need to know to connect the device properly. To learn how to find your MAC Address, click here: Obtaining a MAC Address
5.
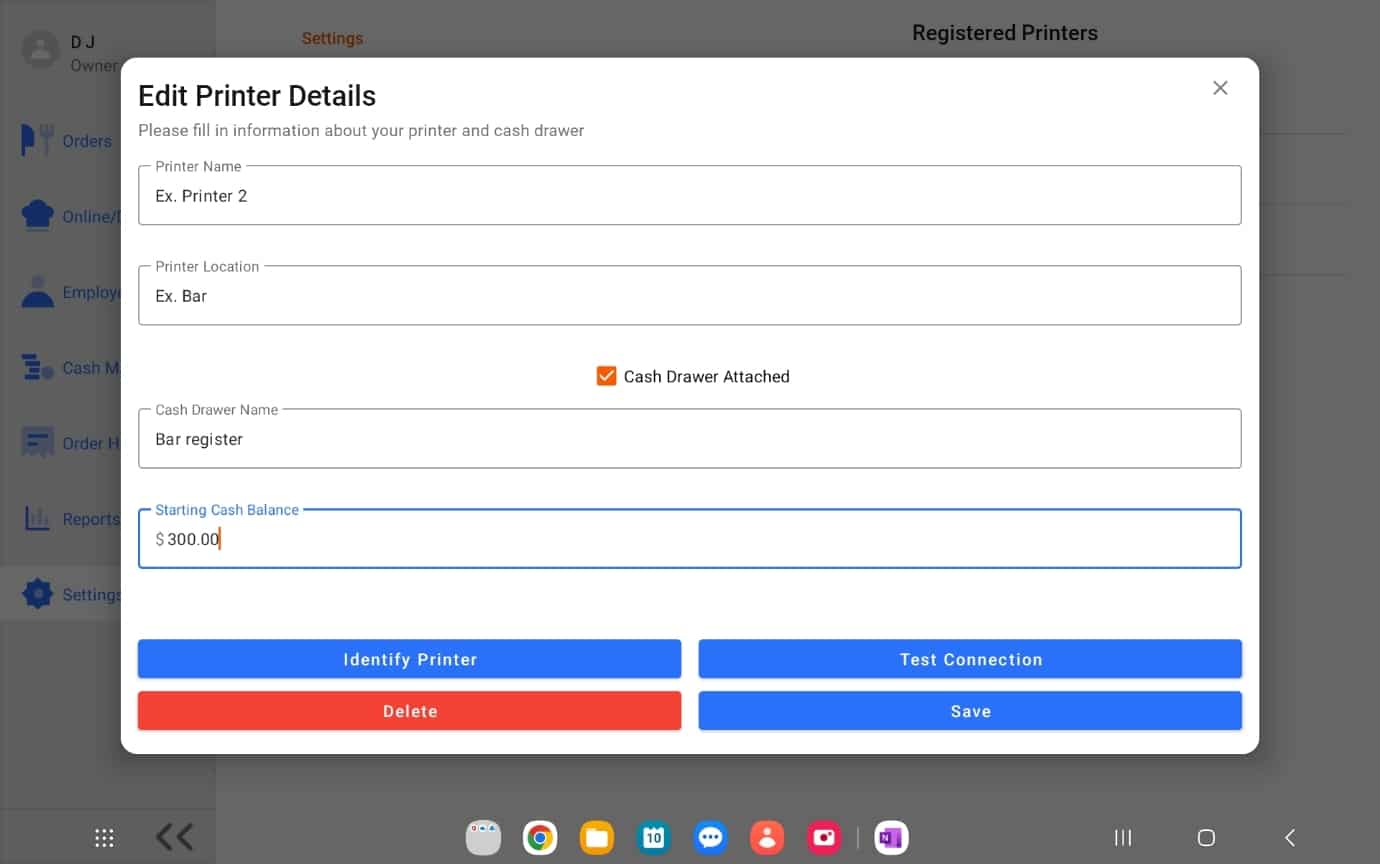
Once a Printer is Selected, a Name and Location can be set, this will help keep track of each printer.
You may attached a Cash Drawer to a Printer. By Checking off Cash Drawer attached. The Cash Drawer should be named and a Starting Cash Balance established.
6.
One the Printer has been added, it will be listed under Registered Printers which can be accessed on the Manage Printers Tab.

7.
Printer Detailed may be edited, by selecting the printer from the registered printer list.

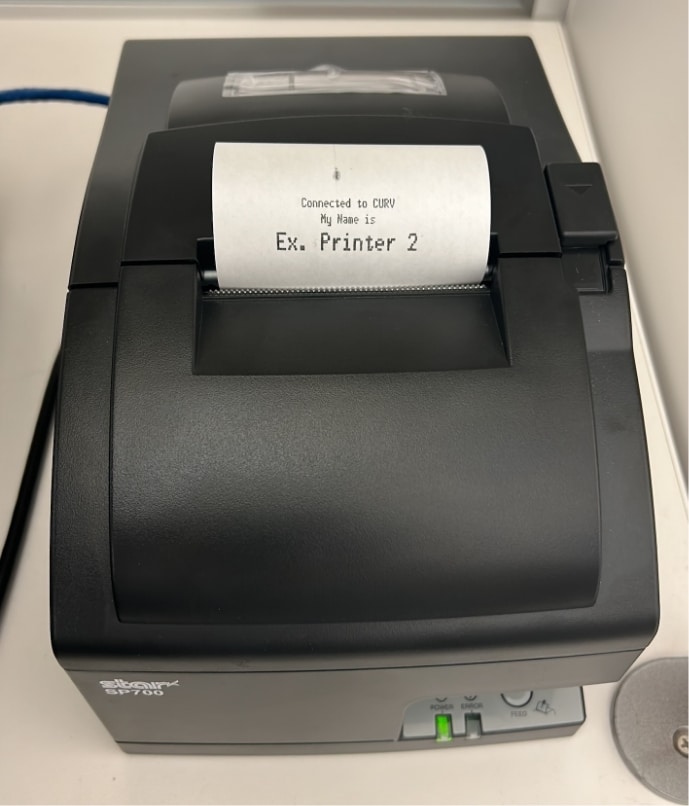
Identify Printer: Prints a Ticket from the printer. The ticket will contain the name of the associated printer. This will be in the format “Connected to CURV my name is Ex. Printer 2”.