

1.
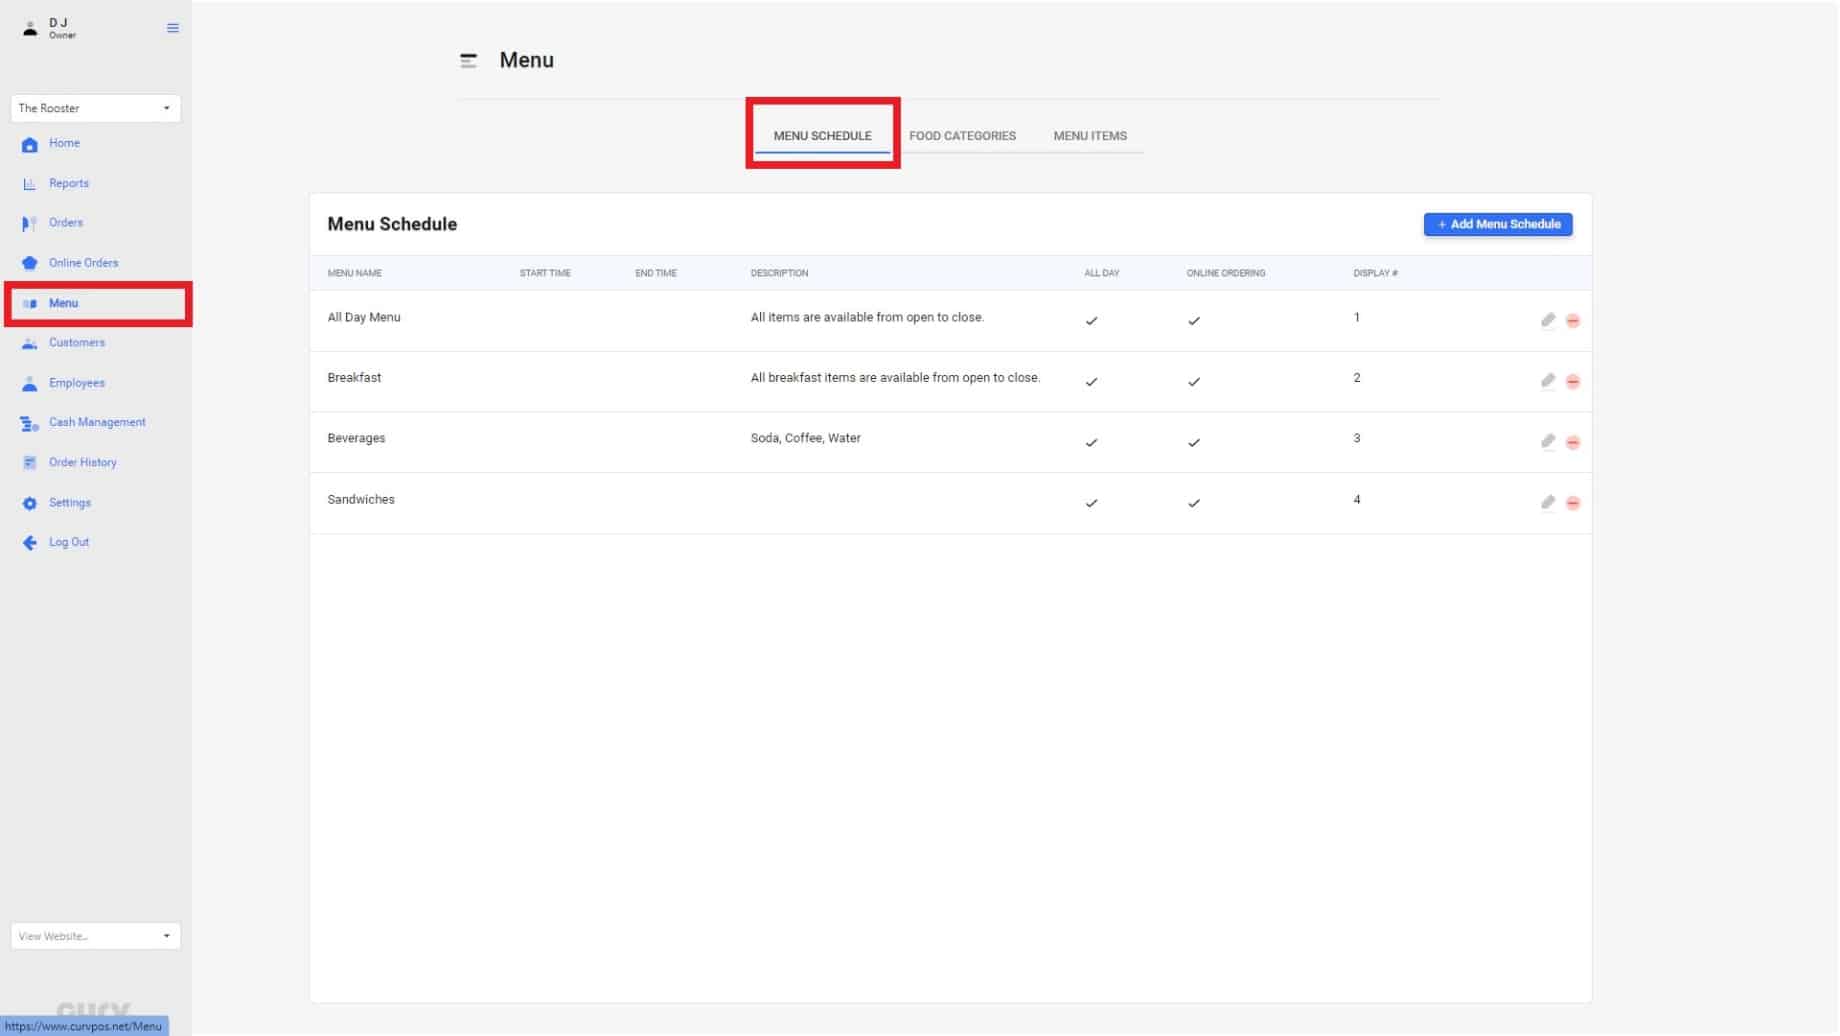
To create a menu schedule, Select “Menu” on the Navigation Bar on the left. Then select Menu Schedules on the left side of tab selections.
2.
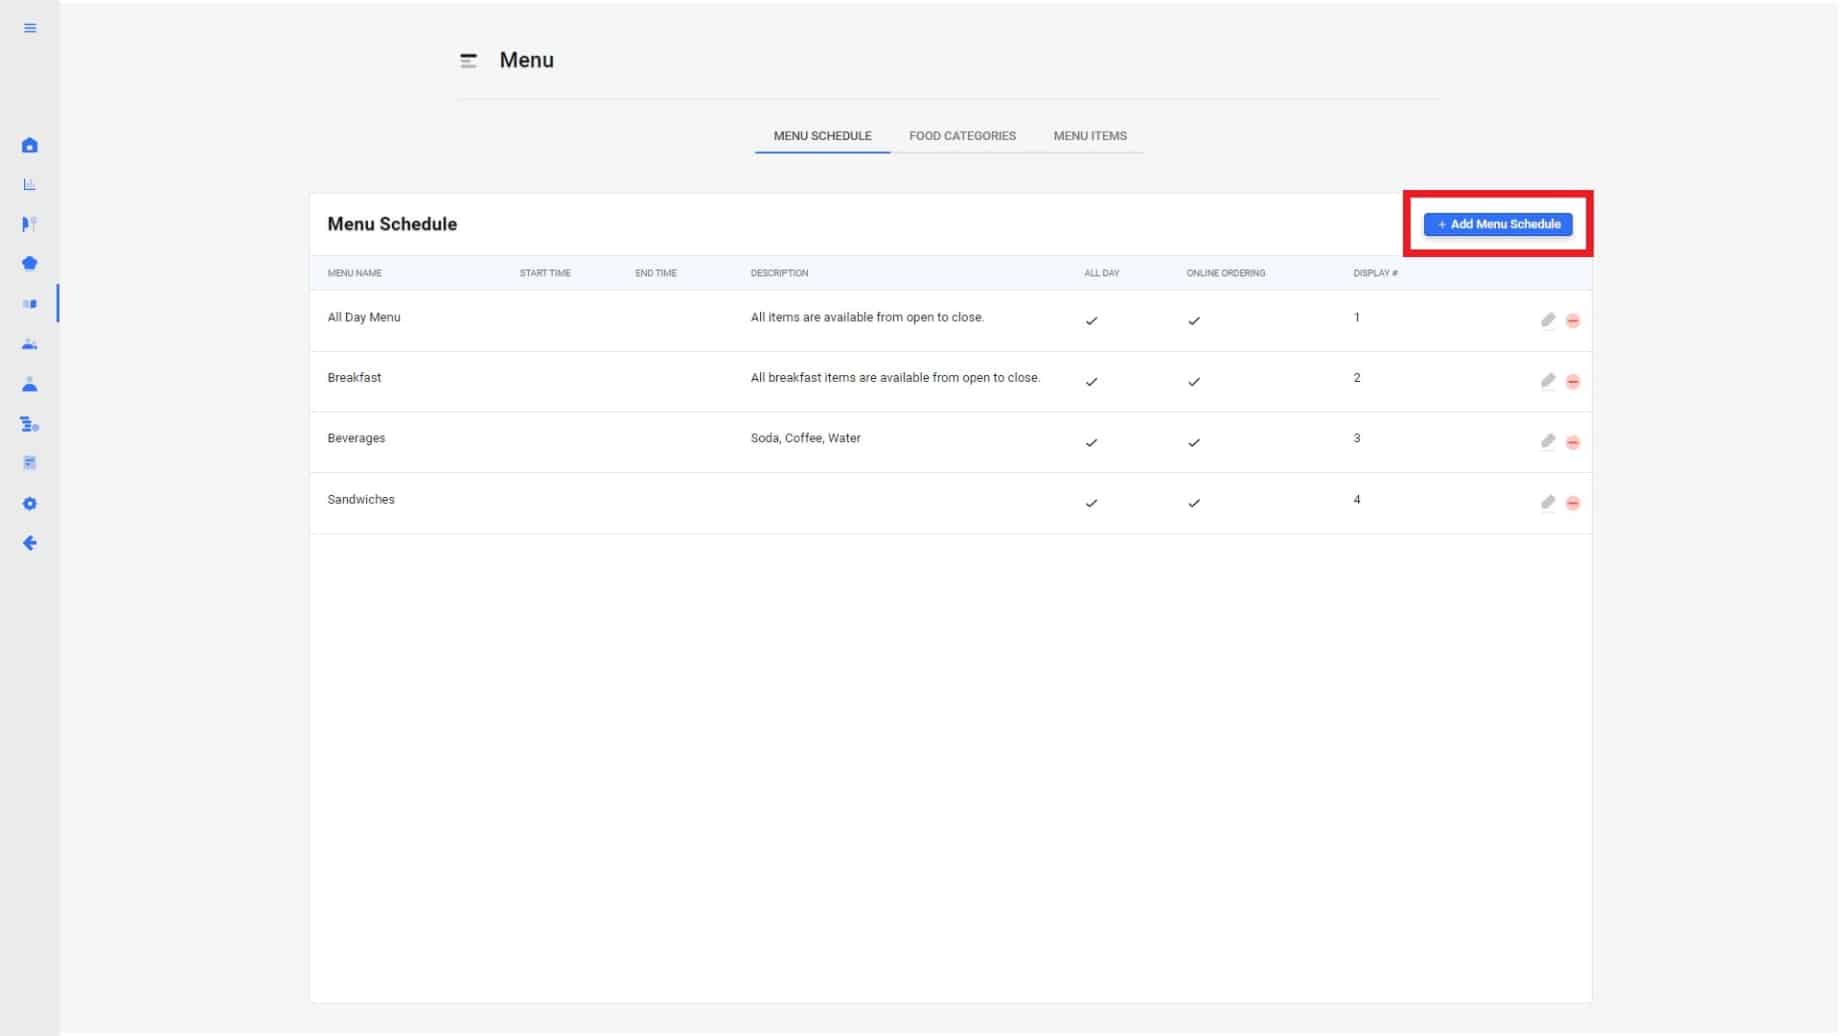
Hit “+ Add Menu Schedule” to start creating your new menu schedule.
3.
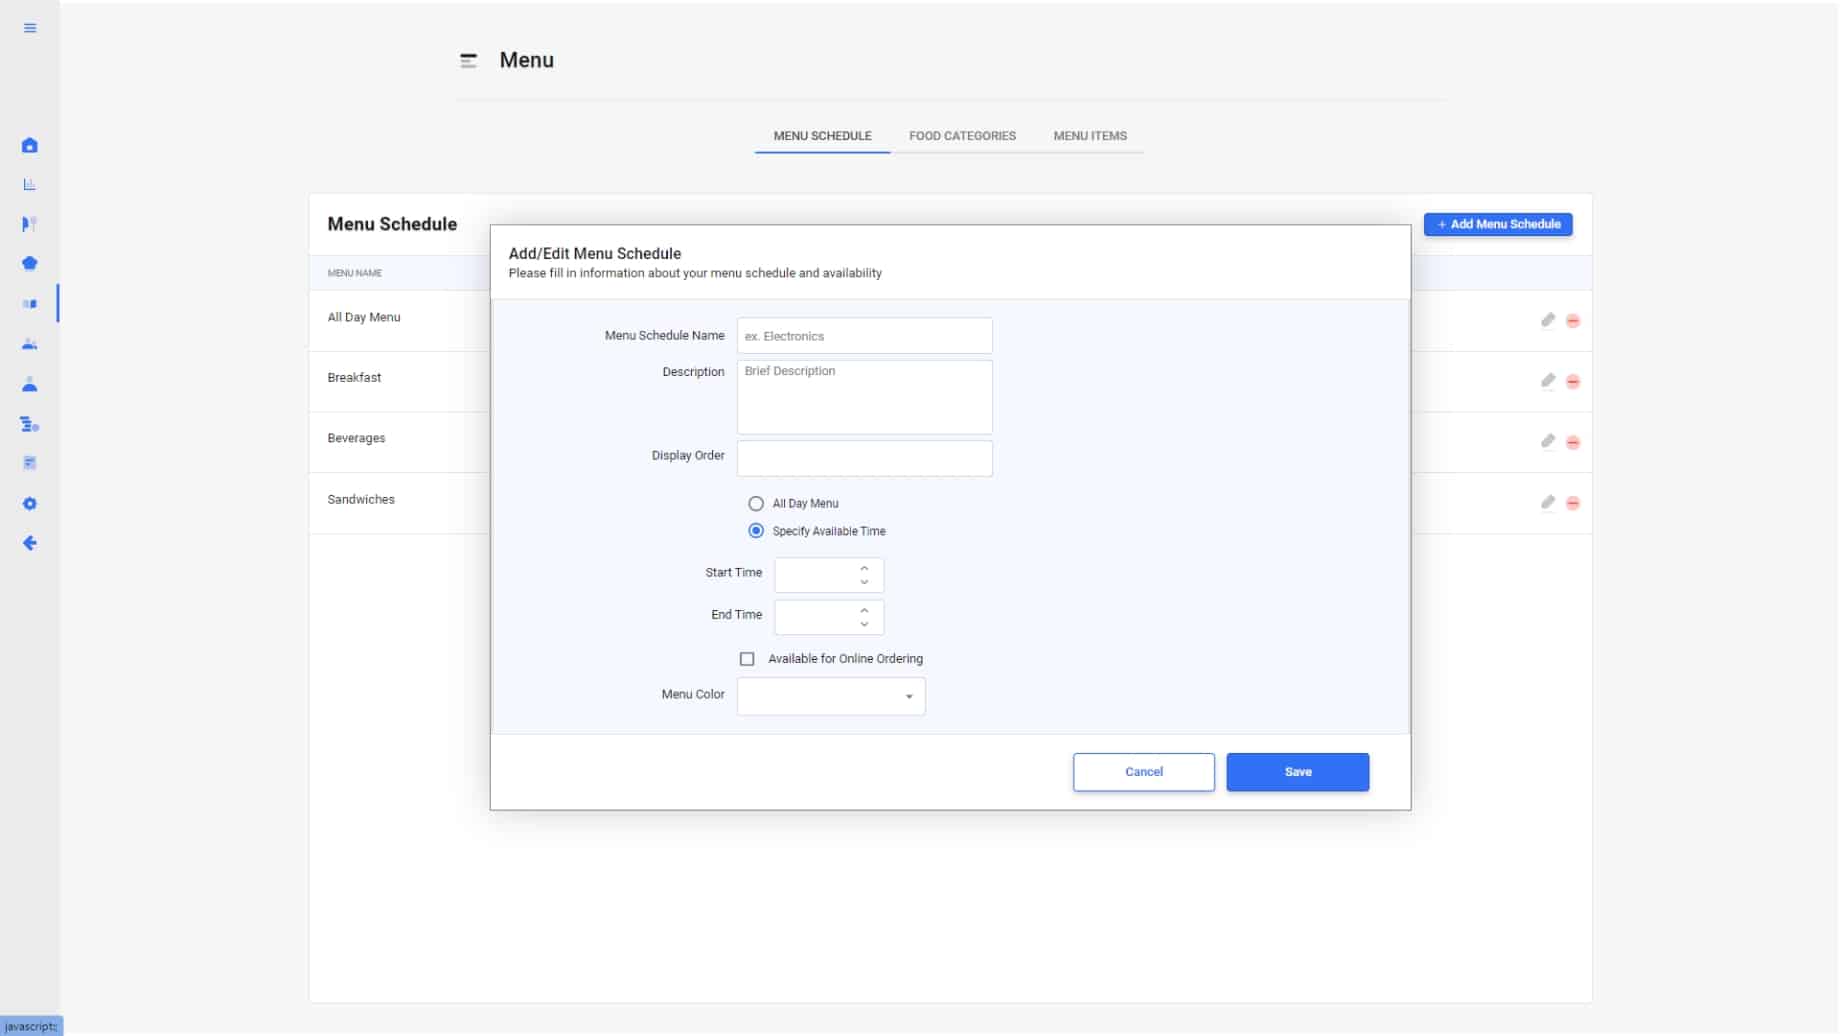
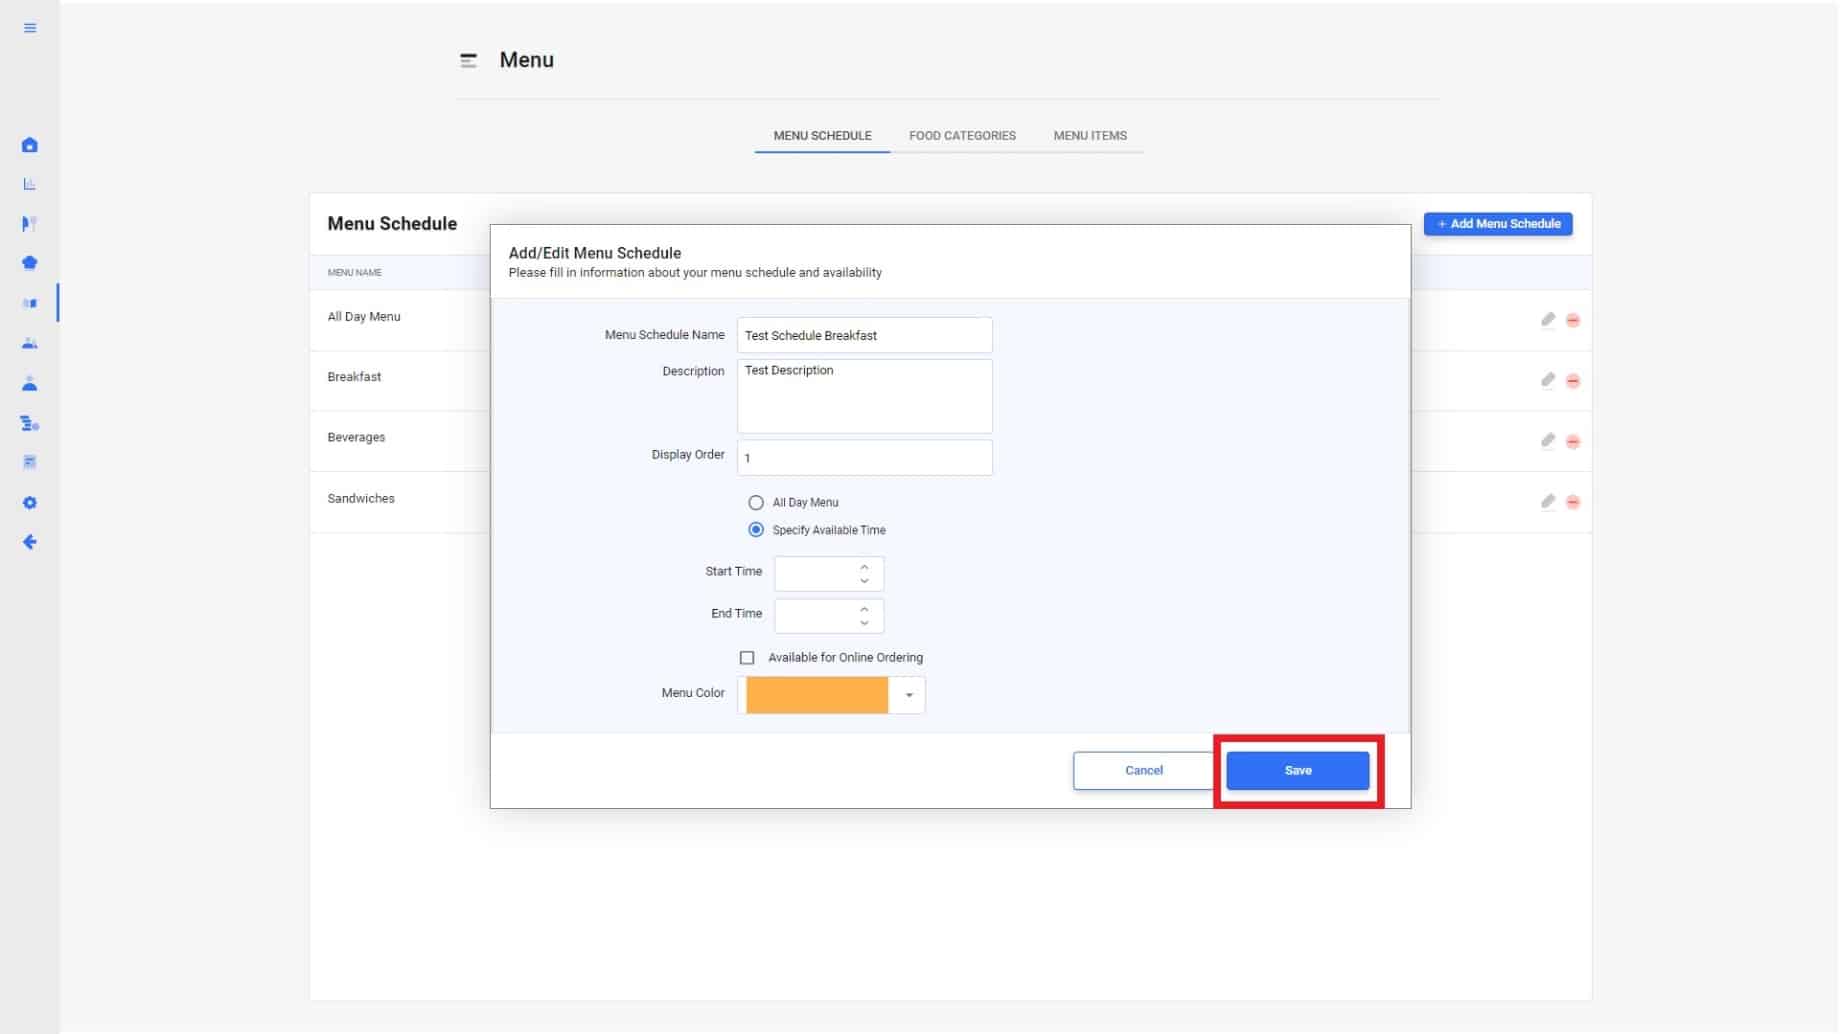
The add/edit pop up menu will now appear. Fill out each box with the information matching your restaurant’s needs. Each box is specified for the following:
- Menu Item name: Breakfast Burrito *required field*
- Description: Ingredients to the item.
- Category: Select which category the menu item will be placed in. This is where the item will be located on the POS. *Required Field*
- Price: Adjust pricing to the restaurant’s needs.
- Image: Upload an image of the menu item that will appear on your CURV Website.
- Treat Customizations as one option: Checking this box will condense all customizations into one table.
- Show Default options in cart: When checked off, any menu item customizations will appear as default in the cart.
- Favorite Item: These items will appear first when creating an order on the POS.*Only Applicable on restaurants using Buffet and Clients Facing App*
- Promotion Prices: In settings > pricing & discount : add promotion prices by date & time. i.e Happy Hour
- Availability: Select if the item is available at one store specifically, or all locations. Select the menu schedule it’ll be paired with.
- Applicable: Checking these boxes will apply Taxes and fee’s. ( Cash Discount fee’s does not need to be checked off to apply)
- Nutrition Facts: Not required, but nutrition information can be inserted and more!
4.
Once the required information has been filled, the option to “Add Customization” to the menu item is available. Select “+ Add Customization” and fill out each box accordingly. If a customization is not needed, hit “Save”. To learn more about adding customizations, CLICK ME.
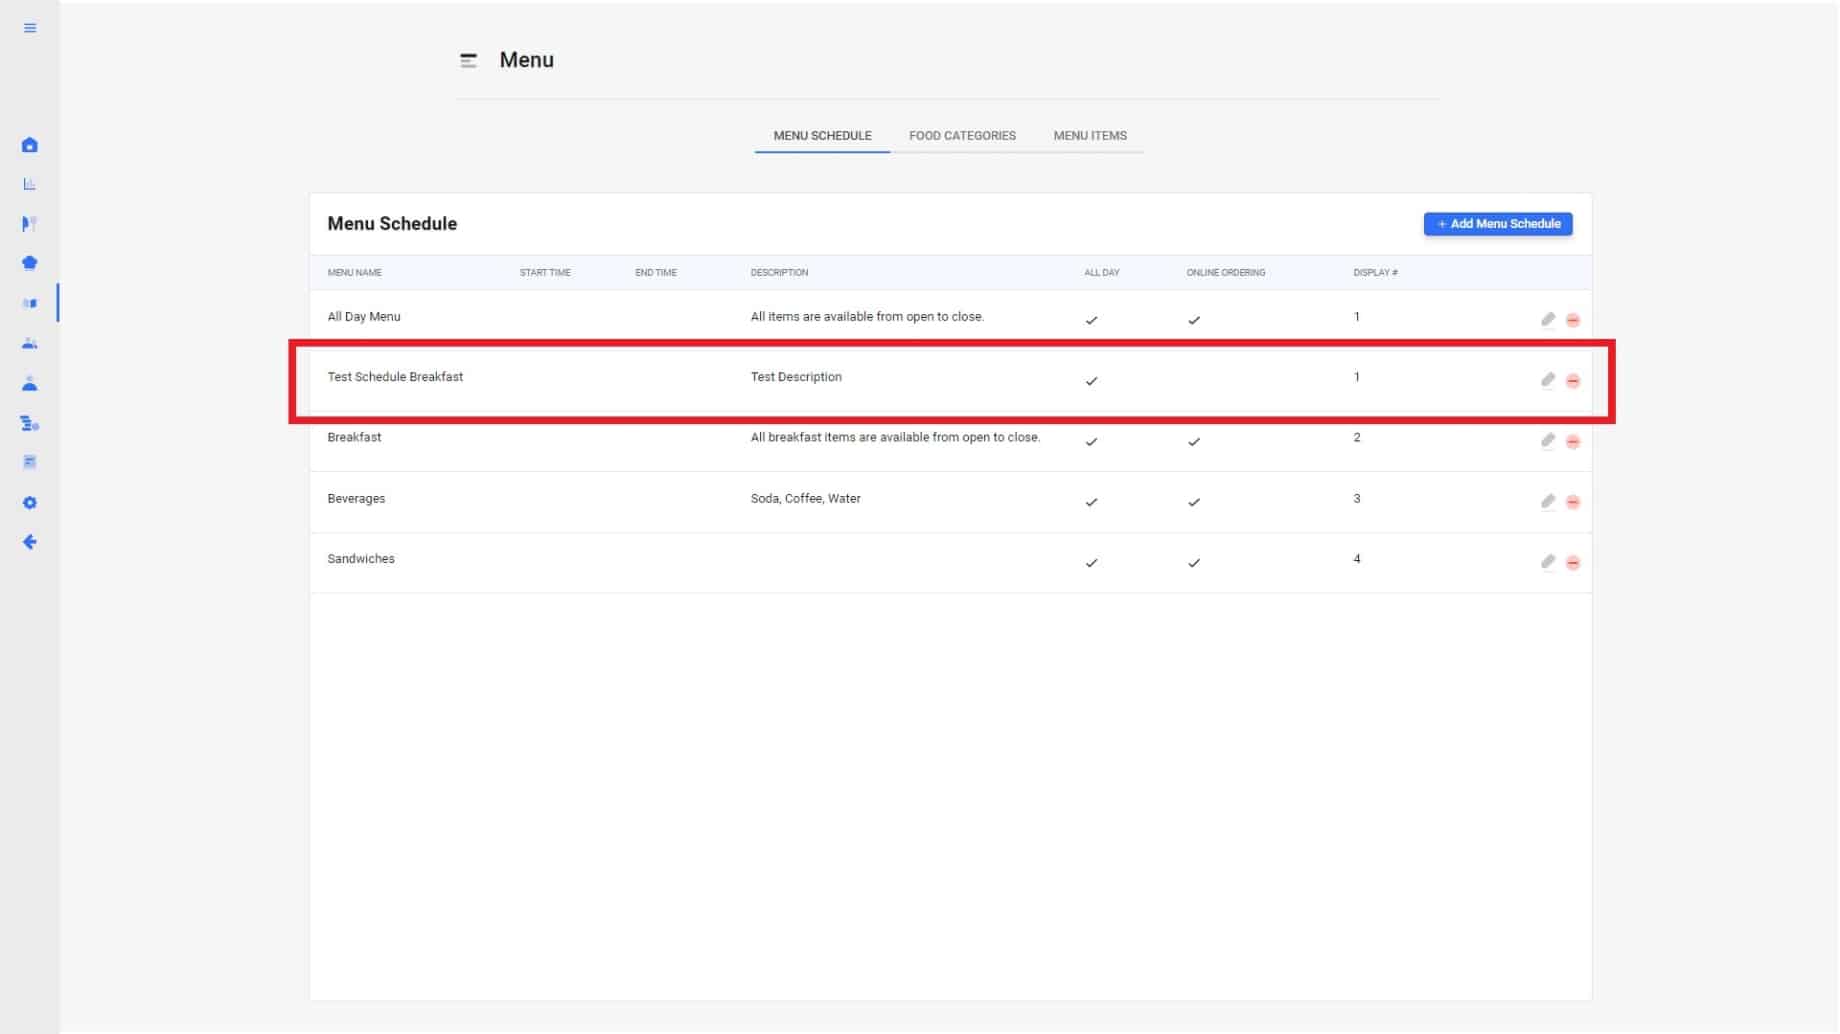
5.
Once saved. You will see your newly created menu schedule in the menu schedule table.
6.
If any adjustments need to be add to the menu item, simply select the edit icon on the right of the table.

7.
The menu item will appear as below.
POS View:

Website View:
