1.
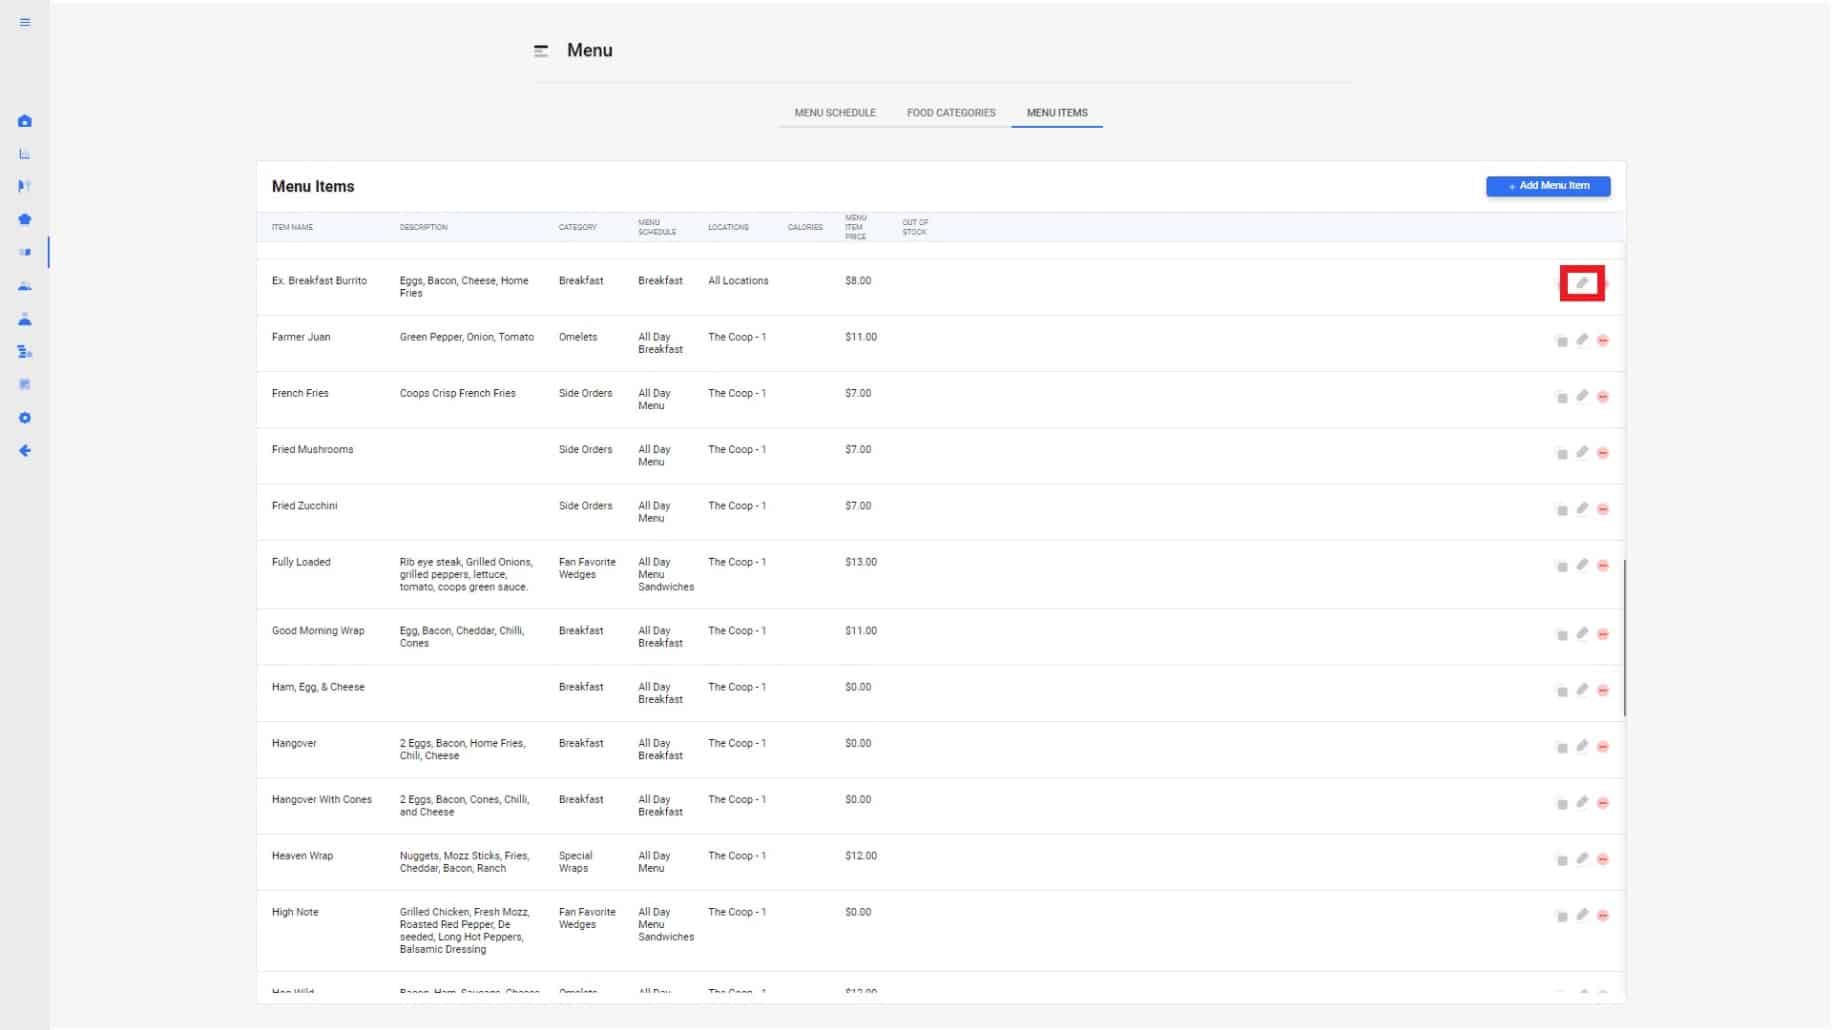
Select the menu item you would like to edit and click the edit button on the right.
2.
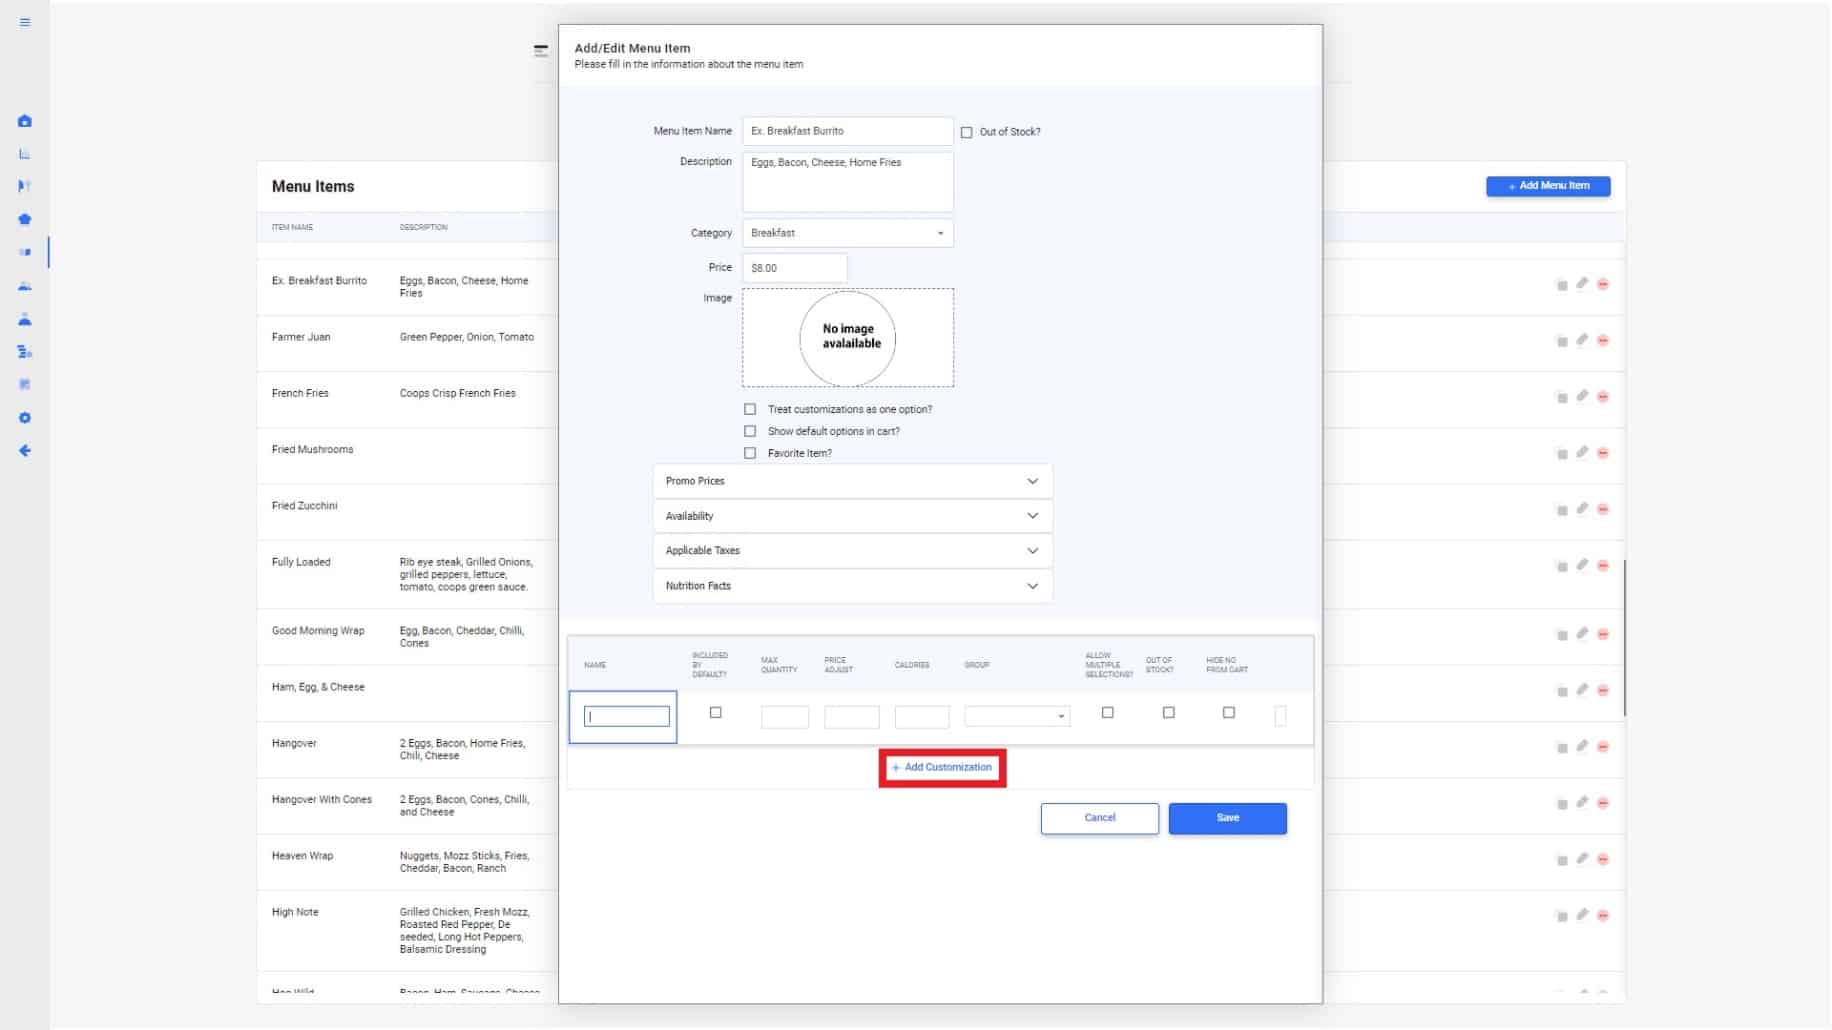
Once the add/edit popup appears, scroll down and select “Add Customization”. Text boxes will appear to add required customizations. There is no limit to how many customizations may be add to an item.
3.
Each box is specified for the following:
- Name: Give customization a name that can be added to your original item.
- Include by default: If this box is checked off, this customization will automatically be included on the menu item.
- Max Quantity: Add multiple and Limit the number of times a customization may be added to a menu item.
- Price Adjustment: All Customizations can be price adjusted, to either increase for an addition, or reduce the price if a customization is removed. Ex. Adding extra cheese will cost $.50, adjust the total price of the breakfast burrito to a total of $8.50. or removing tomato from a burger will be a $.10 price reduction.
- Calories: You can put nutritional information here.
- Group: Customizations are defined by groups, Which can be though of a sub categories for those customizations. Example: There a multiple types of bread available for a sandwich item. All the bread options can be grouped to ” Bread” with all the options linked to the same parameters and header.
- Allow multiple selections: Checking this box off will allow you to select other customization, within the same group, at the same time. If unchecked, only one customization within the defined group can be selected.
- Out of Stock: If an item is out of stock, checking off the box will remove the ability to add the item as a customization. Customer paying online will see a grey line though the item. Employees using the POS app will see a red ! Next to out of stock items.
- Hide from Cart: This option is used for customizations within a group that allow only one selection. This will remove the “no” action on the defaulted item. Example. Drinks sizes are grouped by the header Size. The default size of a coke is small. A large coke is then selected. In the cart the item will display as Coke Add Large. If Hide no from cart is not selected the same item will appear as Coke- No Small Add large.
- Show Default items in cart: This will show all the customizations marked a “Included by Default” in the cart, which will appear on receipts a kitchen tickets.
4.
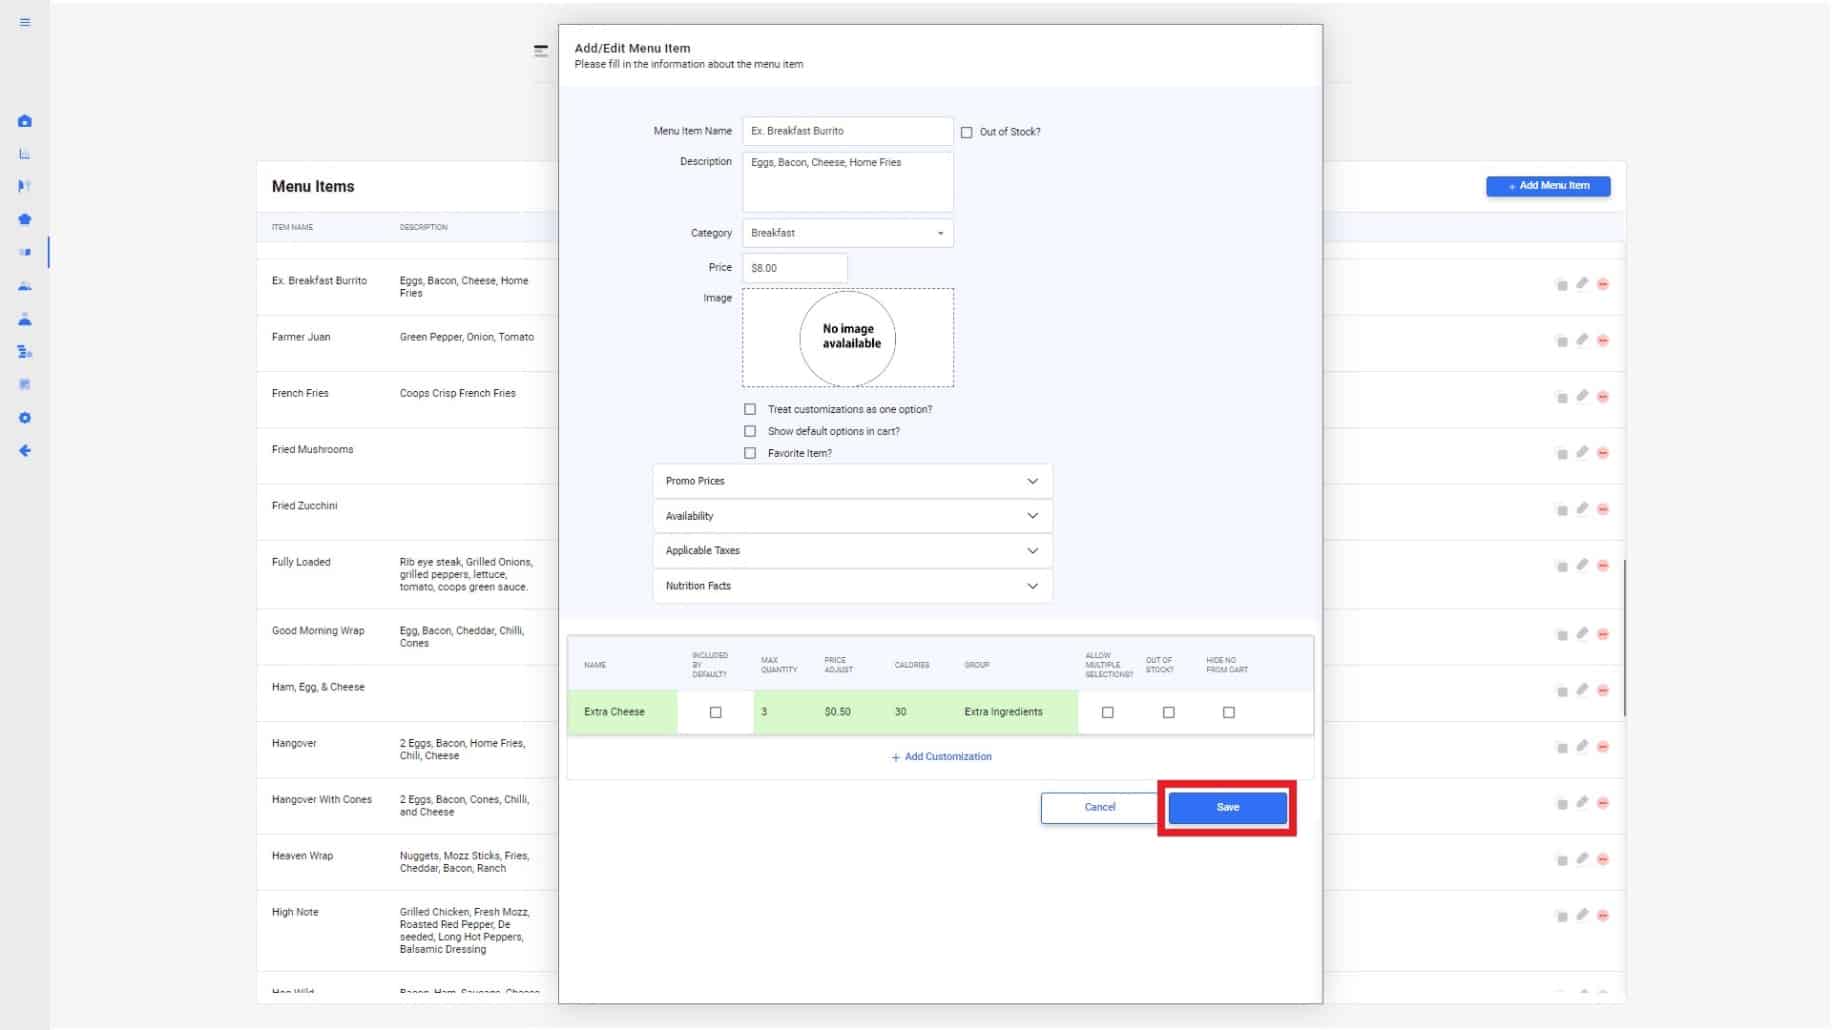
When you are done making your customization, hit save at the bottom right of the pop up menu. You will now be able to see the customization on your POS and CURV website.
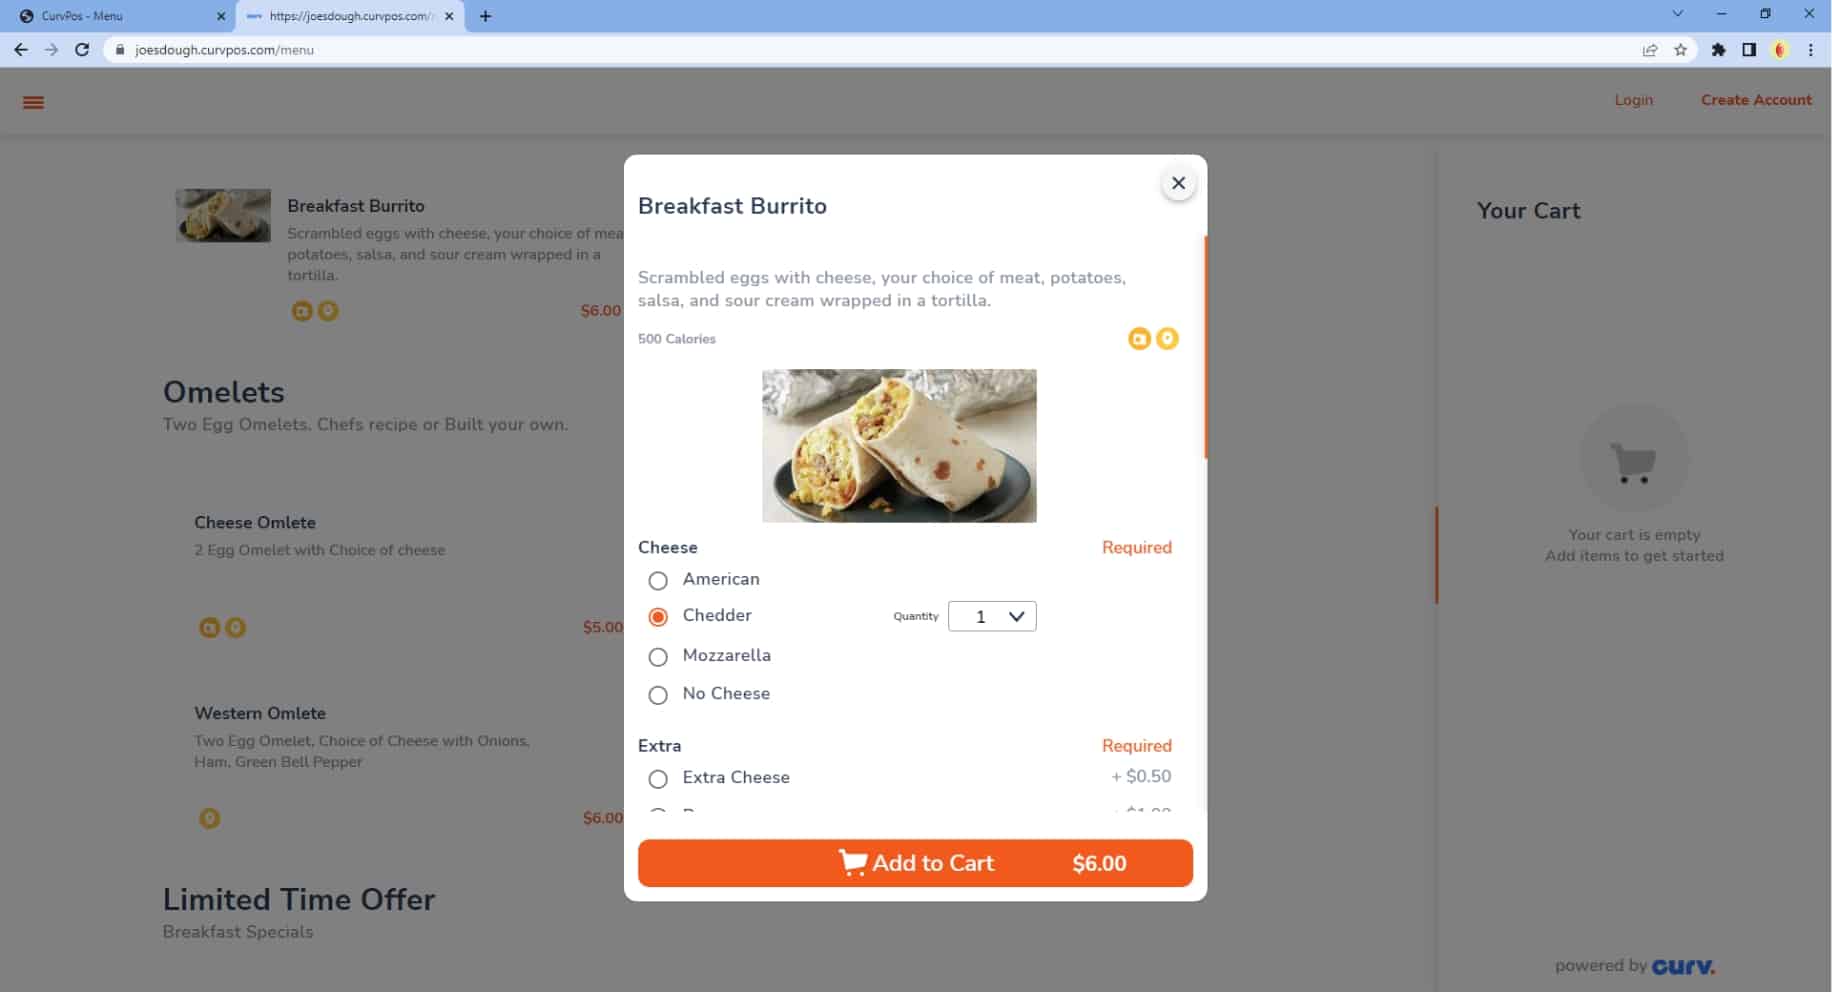
5.
Menu items customizations will appear as below.
POS View:

Website View: