


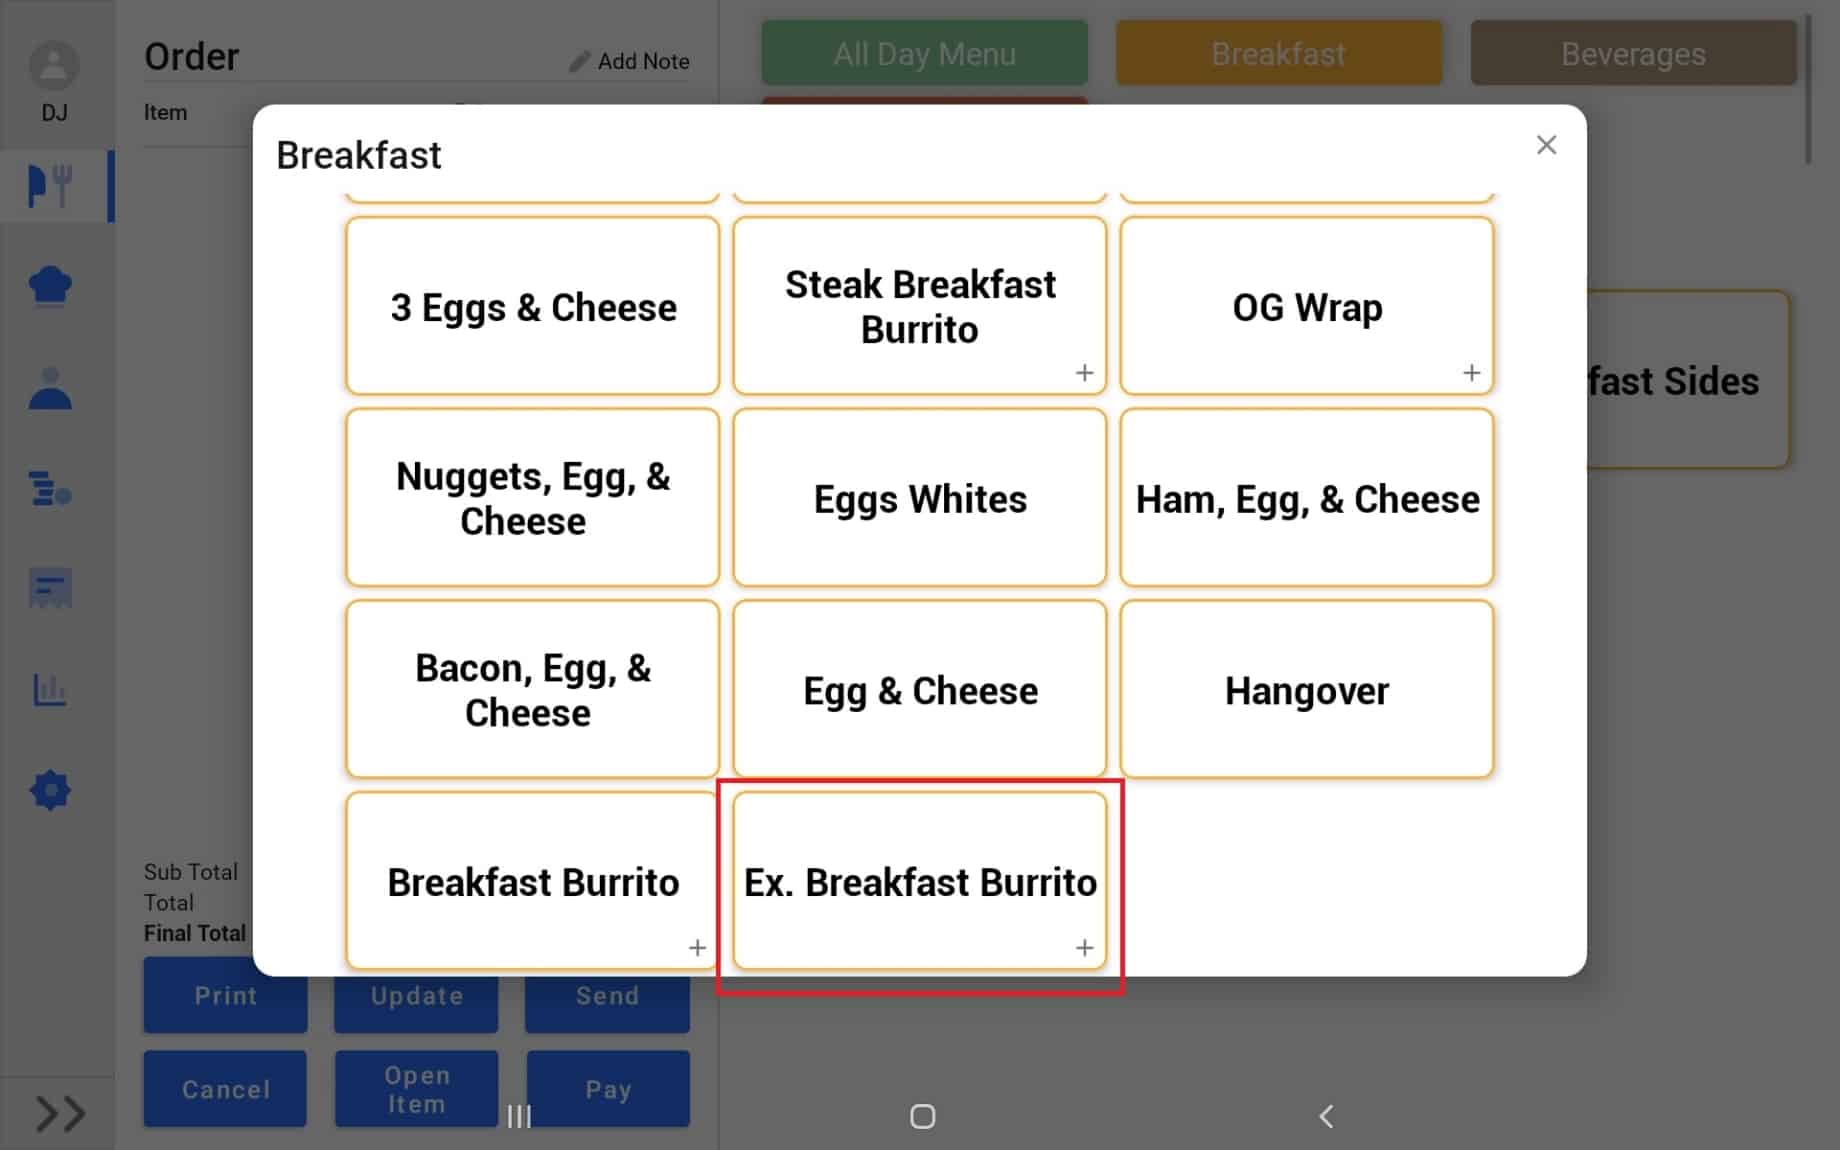
POS View:
Website View:

1.
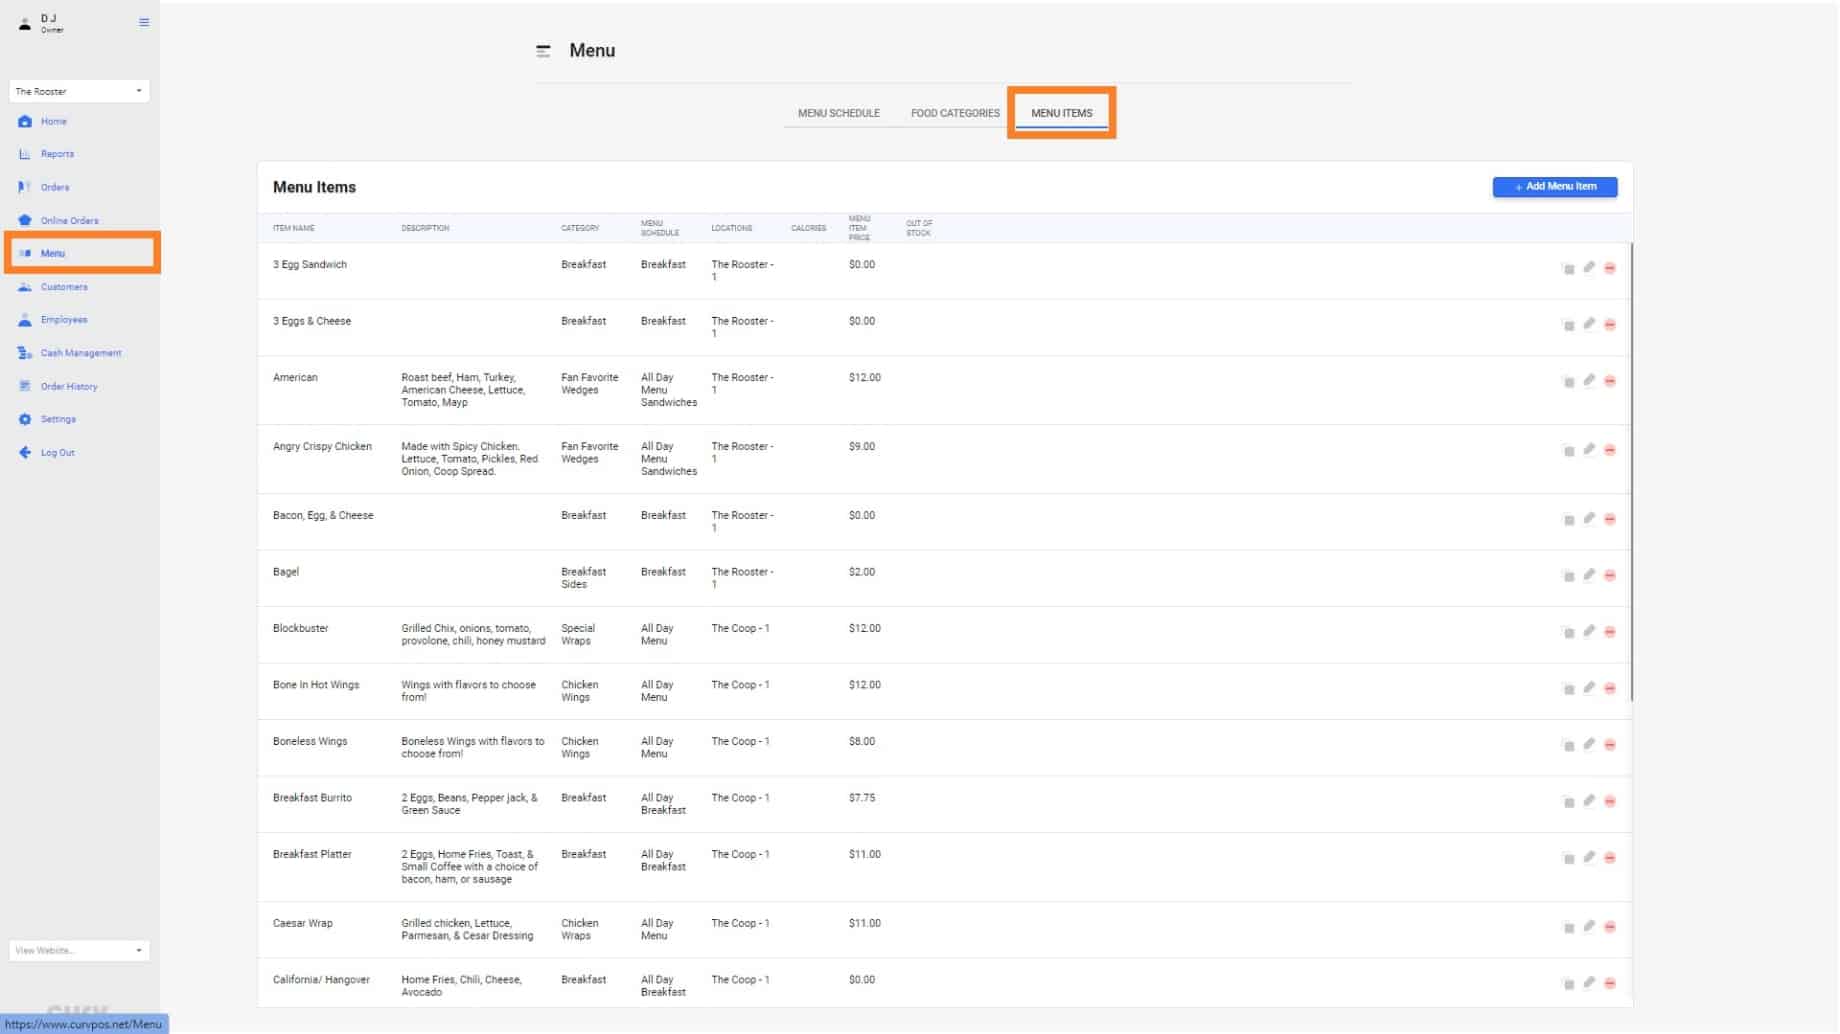
To create a menu item, Select “Menu” on the Navigation Bar. Then select Menu Items on the tab selections.
2.
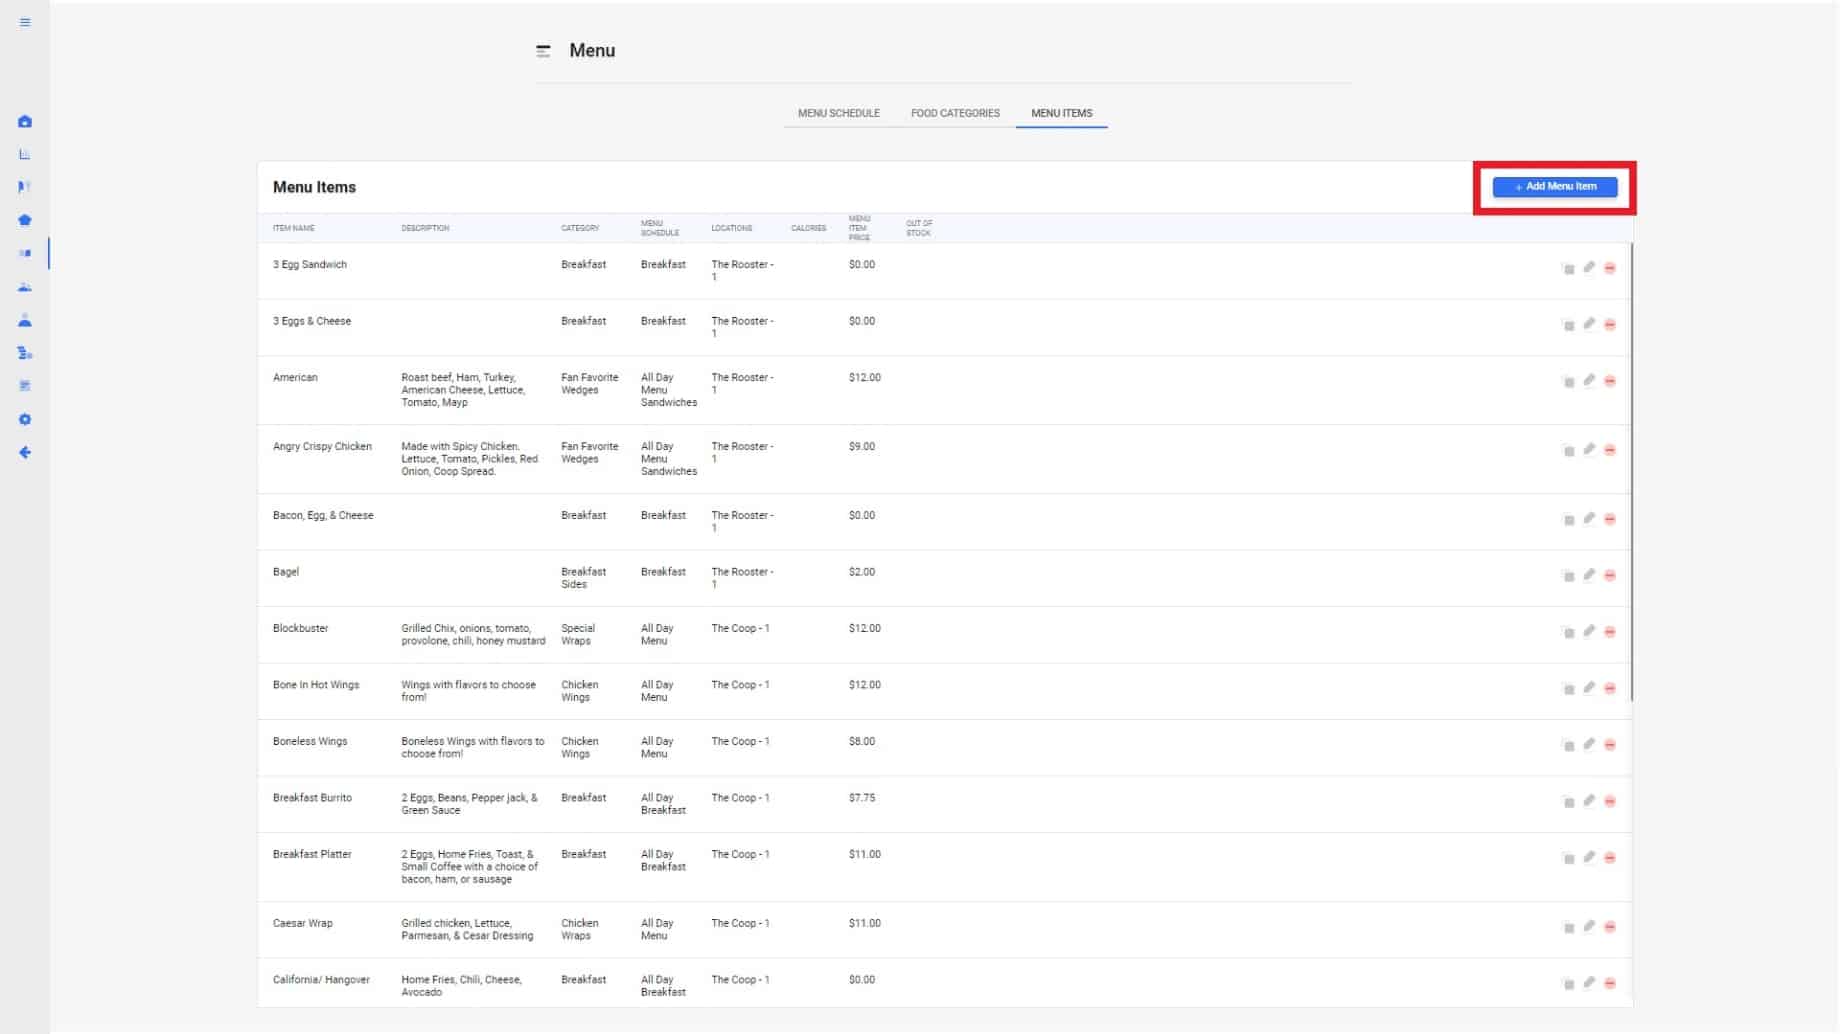
Select “+Add Menu Item” near the top right corner of the webpage to start creating your new menu item.
3.
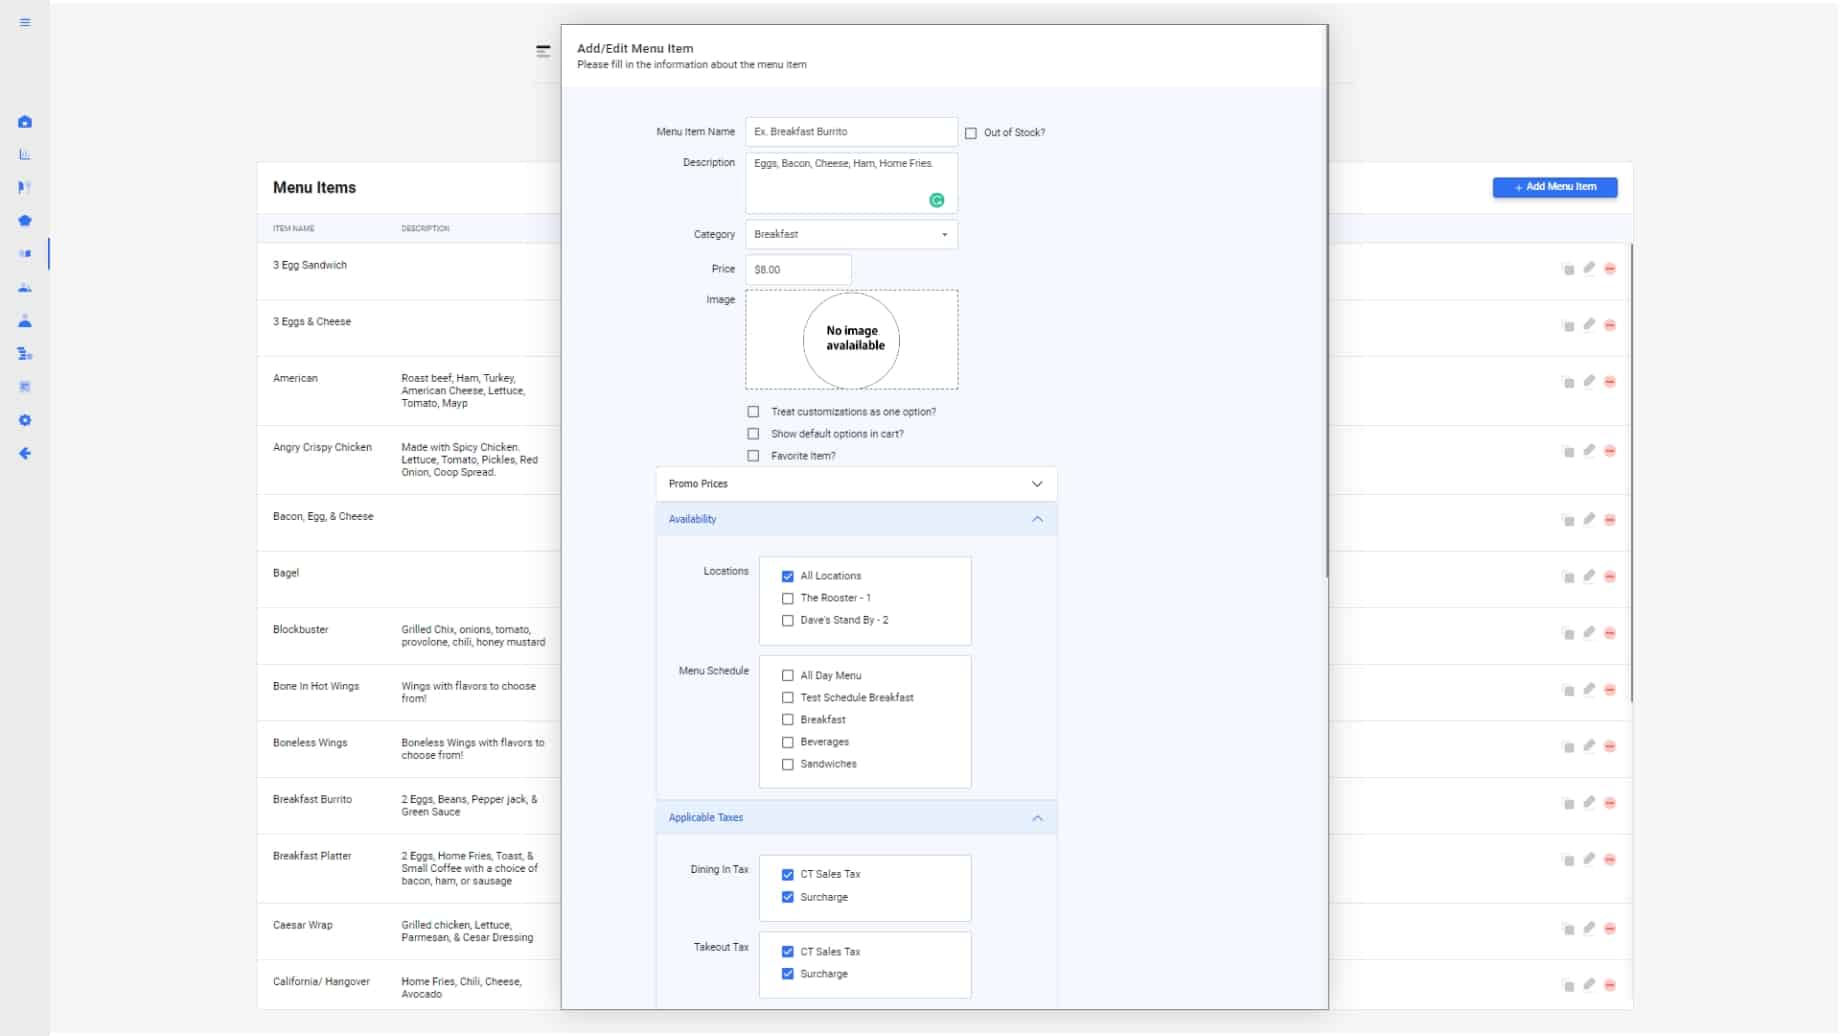
The add/edit pop up menu will now appear. Fill out each box with the information matching your restaurant’s needs.
Each box is specified for the following:
4.
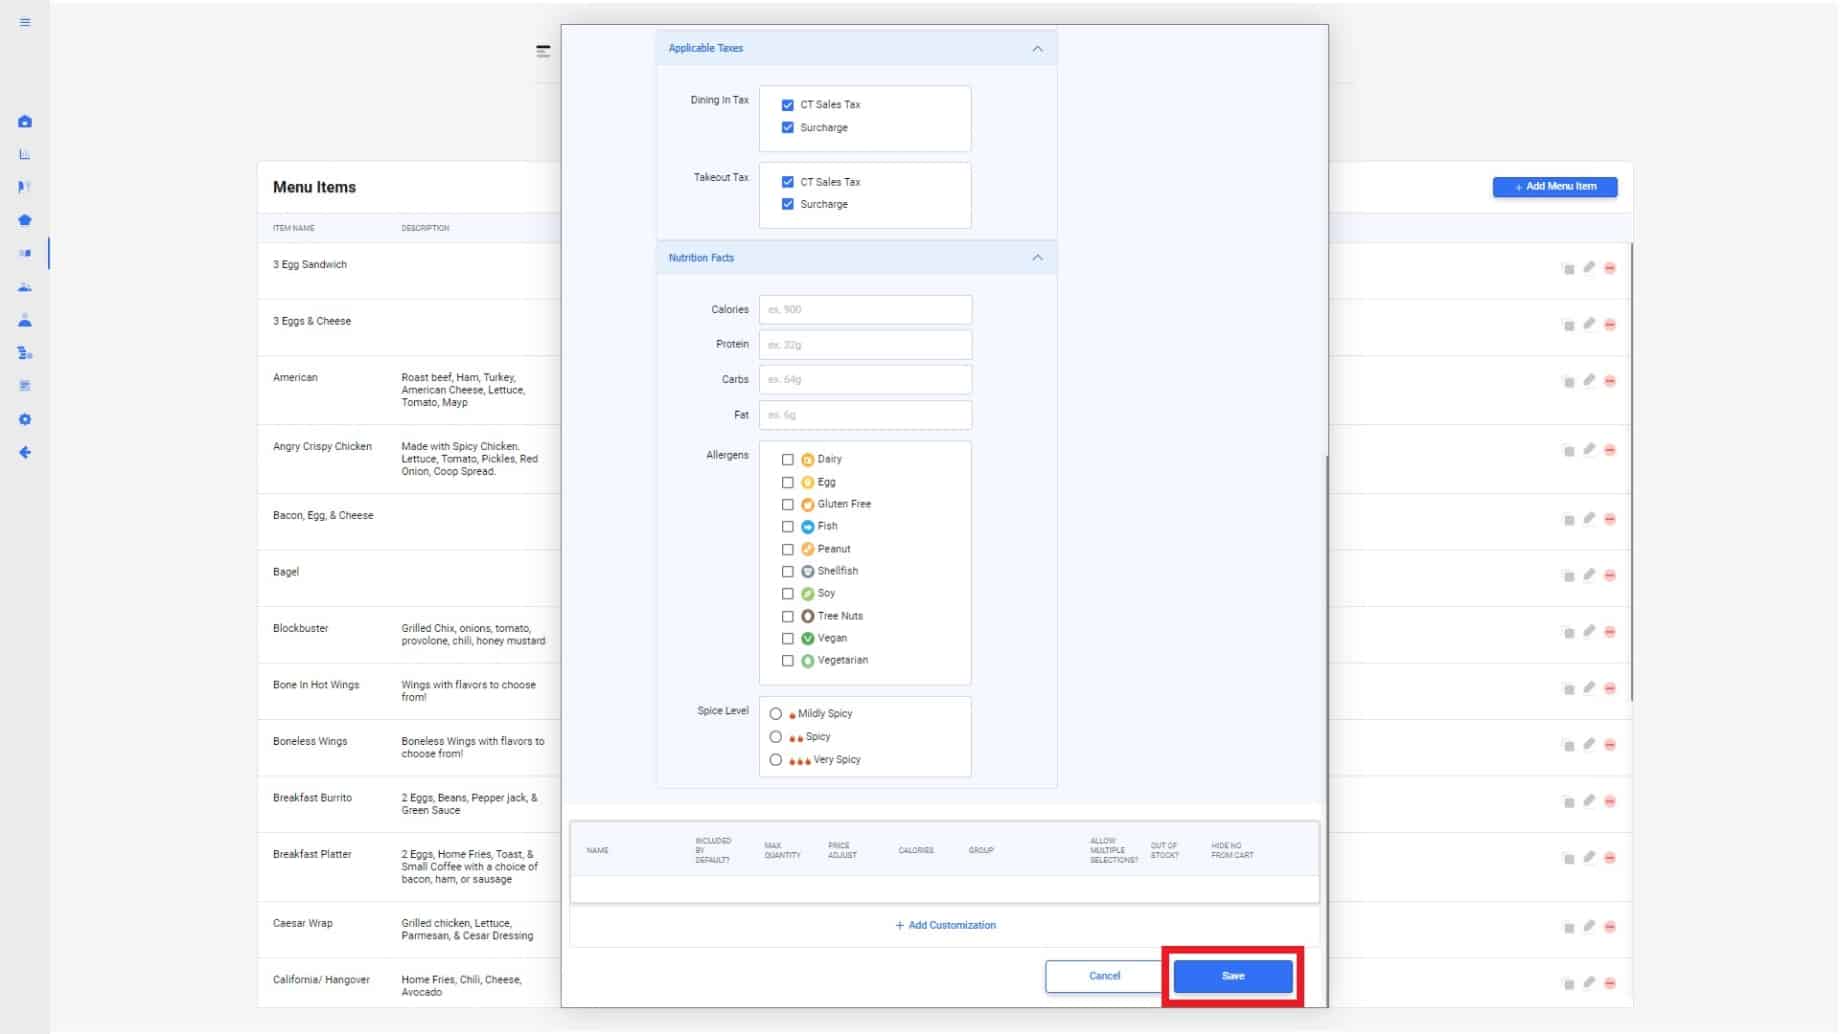
Once you have filled in the required information, you have the option “Add Customization” to your menu item. Select “+ Add Customization” and fill out each box accordingly. If you do not wish to create a customization, hit “Save”. To learn more about adding customizations, CLICK HERE.
5.
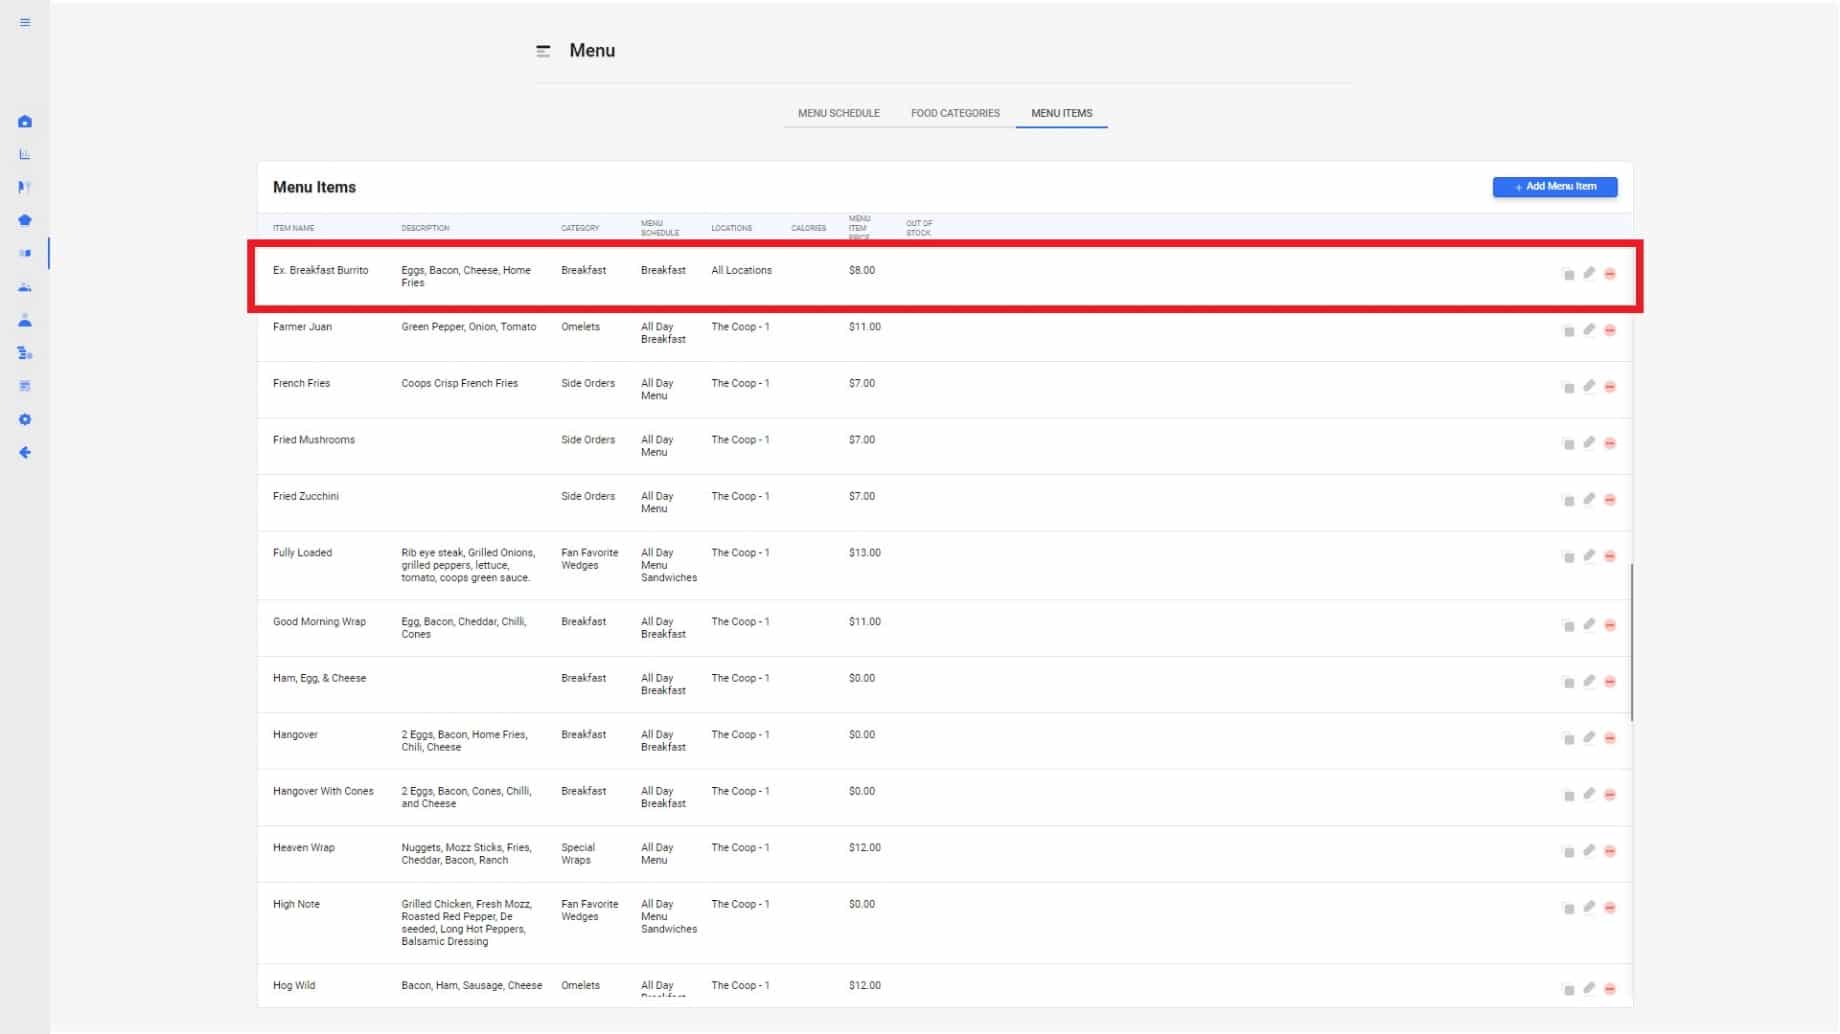
Once saved. You will see your newly created menu item in the menu items table.
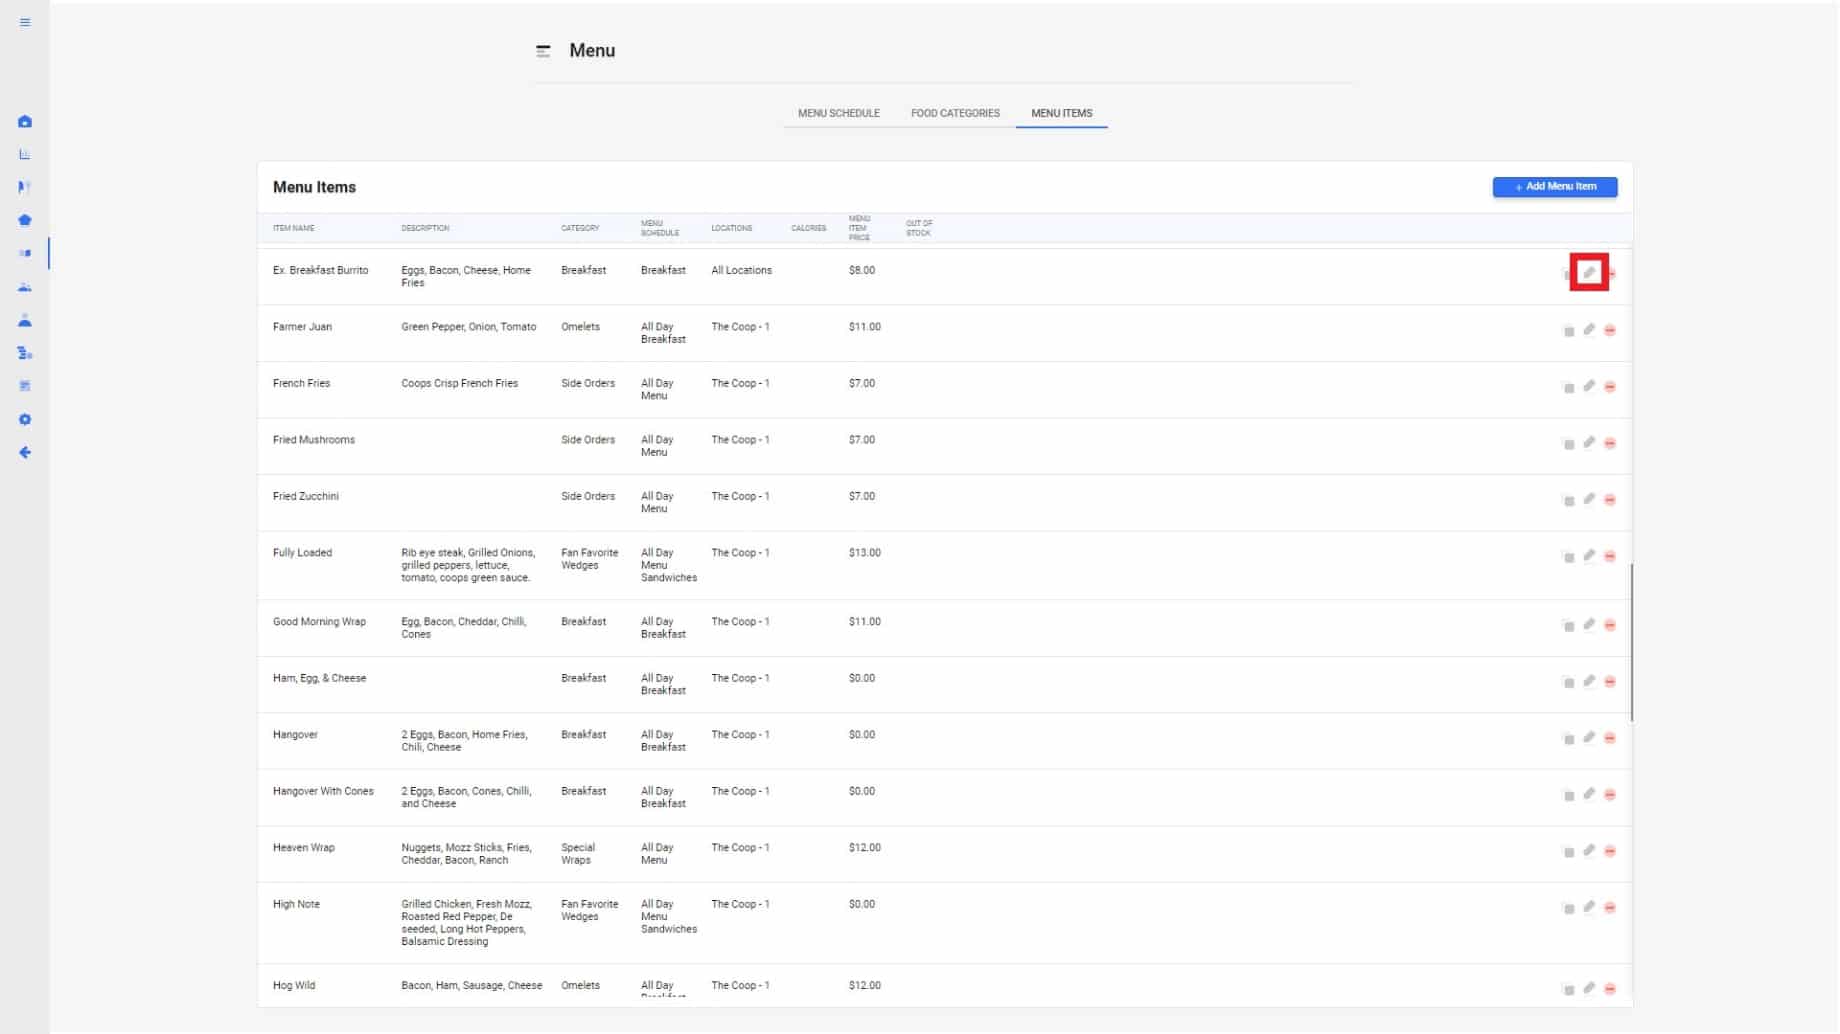
6.
If you need to make any adjustments to your menu item, simply select the edit icon on the right of the table.
7.
Your menu item will appear as below.
| Cookie | Duration | Description |
|---|---|---|
| cookielawinfo-checkbox-analytics | 11 months | This cookie is set by GDPR Cookie Consent plugin. The cookie is used to store the user consent for the cookies in the category "Analytics". |
| cookielawinfo-checkbox-functional | 11 months | The cookie is set by GDPR cookie consent to record the user consent for the cookies in the category "Functional". |
| cookielawinfo-checkbox-necessary | 11 months | This cookie is set by GDPR Cookie Consent plugin. The cookies is used to store the user consent for the cookies in the category "Necessary". |
| cookielawinfo-checkbox-others | 11 months | This cookie is set by GDPR Cookie Consent plugin. The cookie is used to store the user consent for the cookies in the category "Other. |
| cookielawinfo-checkbox-performance | 11 months | This cookie is set by GDPR Cookie Consent plugin. The cookie is used to store the user consent for the cookies in the category "Performance". |
| viewed_cookie_policy | 11 months | The cookie is set by the GDPR Cookie Consent plugin and is used to store whether or not user has consented to the use of cookies. It does not store any personal data. |